


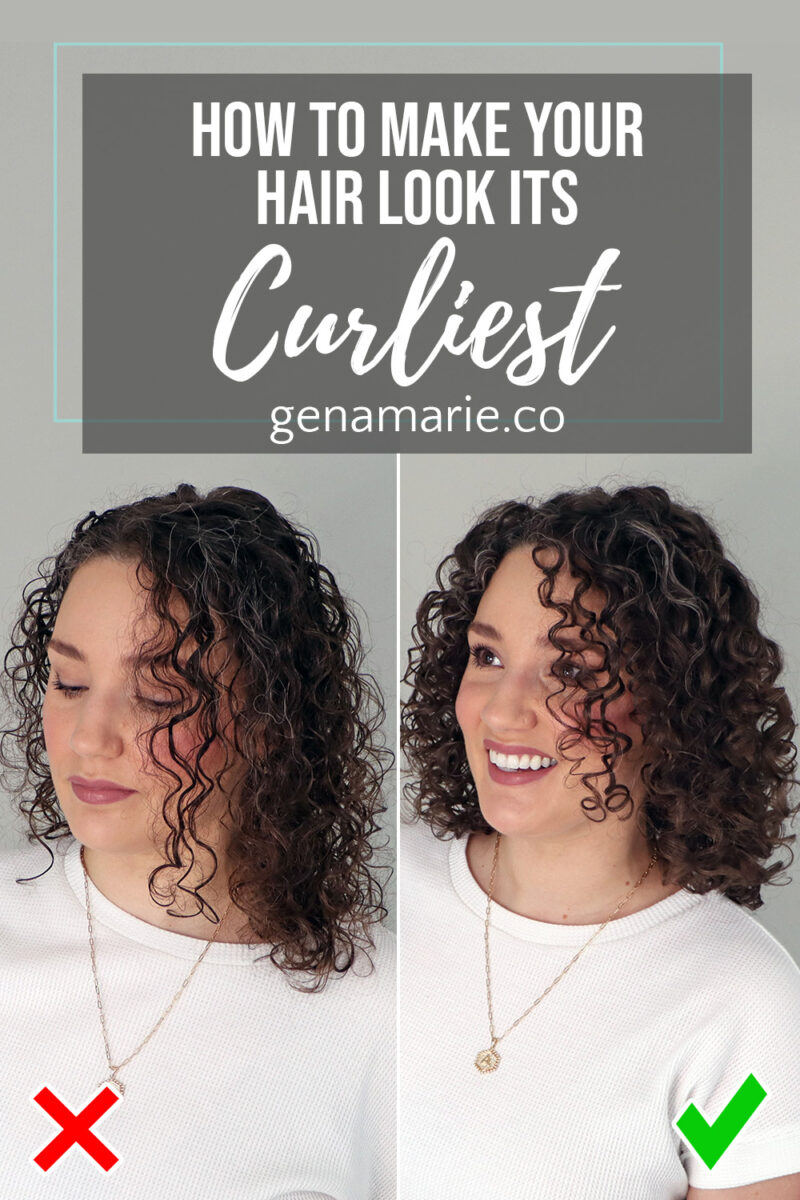
How to Make Your Hair Look Its Curliest (Without Forcing It)
If your curls aren’t curling up the way you want and you’re starting to feel frustrated or ready to give up, it’s probably not your
This post is sponsored by Curlsmith. Read full disclosure here.
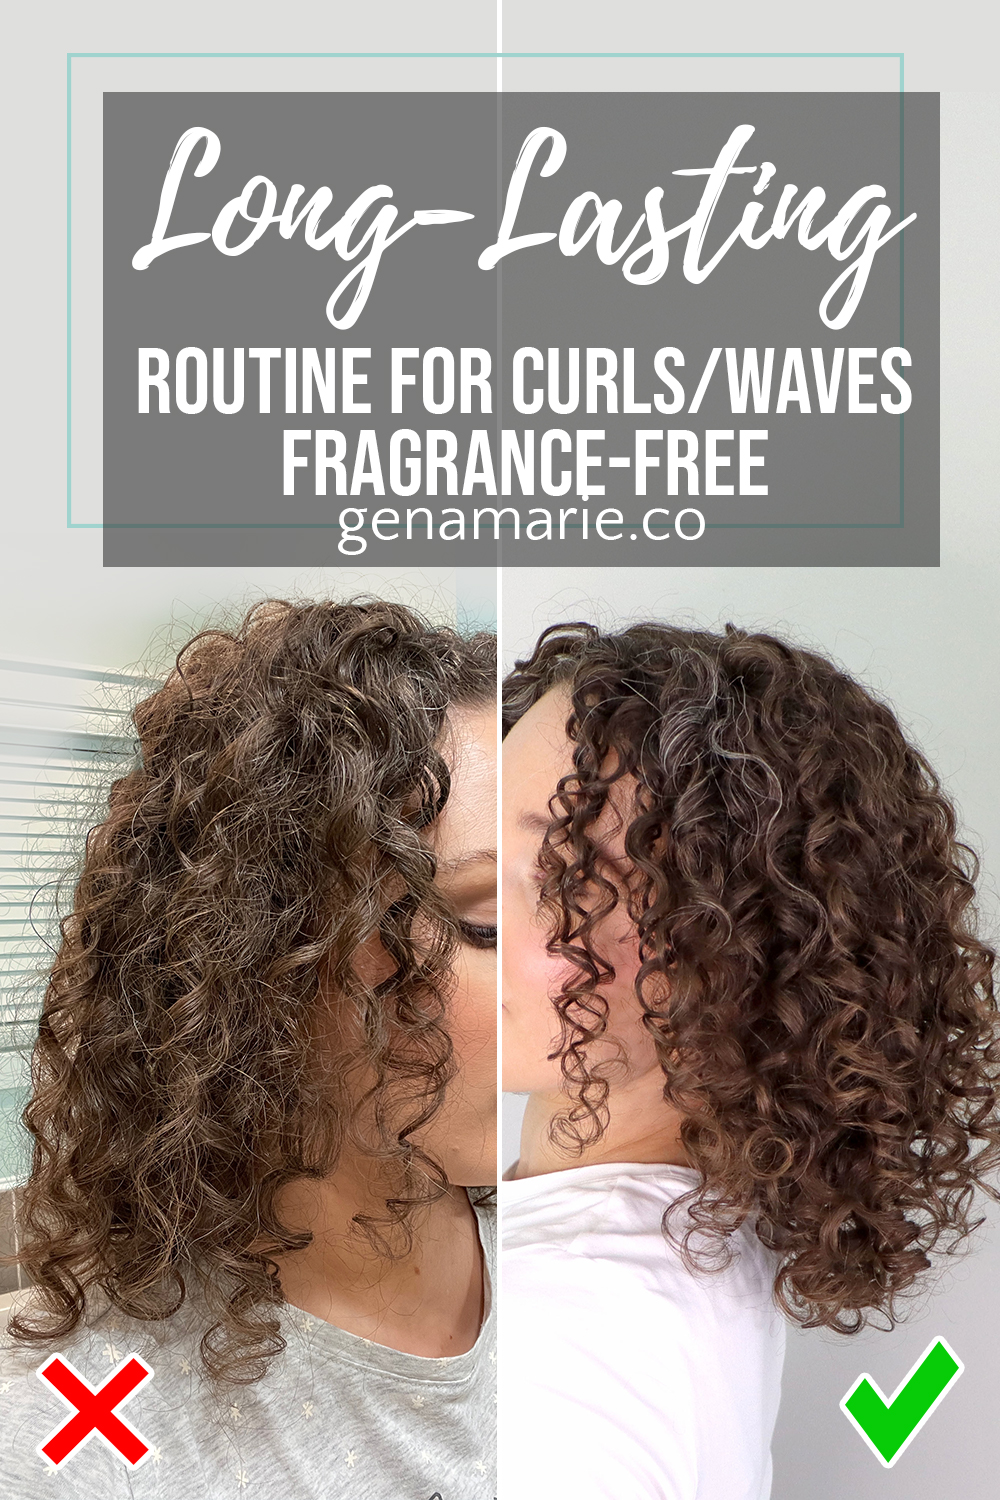
Using the wrong products and techniques can cause your waves and loose curls to fall limp, flat, and not last. In this video, I’m showing you how to get longer-lasting results using some fragrance-free products from Curlsmith, who are partnering with me for this video.
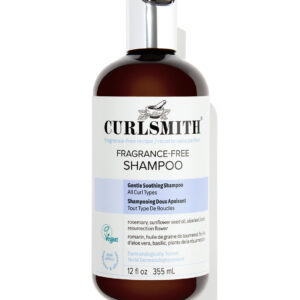
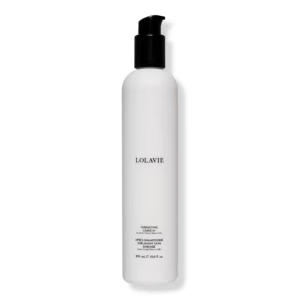
The first step to getting your waves and loose curls to last starts with getting a thorough cleanse from your shampoo. The NEW Fragrance-Free Shampoo from Curlsmith is specifically designed for sensitive scalps.
While I don’t struggle with these things, so many of my clients and viewers struggle with having a sensitive scalp, allergies, migraines, or just scent sensitivity. And, for some reason, there are very few fragrance–free product options out there – especially for wavy/curly hair! This Curlsmith line is actually unscented, so there is no smell at all!
The shampoo gives a nice lather and effectively cleans my scalp. I recommend double cleansing to ensure everything is removed. I find it to be about a medium moisture shampoo and suitable for frequent washing.
If you’re not using a shampoo that is strong enough, then you could be leaving behind oil, product residue, and too much conditioning which can impact your hold longevity. This is often the root cause of my clients’ not getting enough hold when they’ve already tried everything. Don’t discount the importance of a thorough cleanse! After rinsing, the hair should feel clean but not super dry and stripped or overly soft.
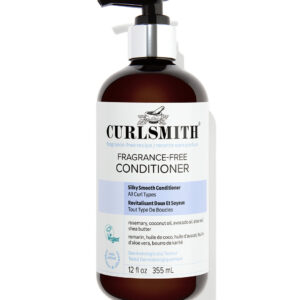
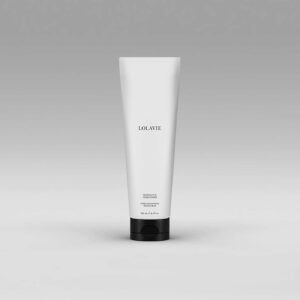
The next step to getting waves and loose curls to last is making sure they are properly moisturized/conditioned without overdoing it. Like the shampoo, the NEW Fragrance-Free Conditioner from Curlsmith is specifically designed for sensitive scalps and is dermatologically tested. The soft slip allows for gentle detangling, leaving silky smooth waves and curls. It provides up to 80% more hydration when used WITH the Fragrance-Free Shampoo.
When it comes to your conditioner, if you’re using something that is too heavy your hair may be weighed down and not hold. Even though we rinse out our conditioner, it’s still leaving behind conditioning agents on the hair shaft which can impact hold.
Fortunately, this conditioner is not too heavy. I find it to be a mediumweight conditioner to soften and condition without weighing down the hair. It contains shea butter, avocado oil, and coconut oil so I recommend using it sparingly for fine hair types. Make sure you are spending some time thoroughly rinsing out your conditioner and not leaving any behind if you’re struggling with not getting hold.
Before styling, I like to mist my hair with water to ensure it’s evenly wet. Most people will say you should be styling soaking wet (which the directions on the package actually say to do), but this isn’t the case for all hair types. I know from experience that soaking wet styling doesn’t work for my low-density curls. So I will be applying my stylers to evenly wet hair, but not dripping.
While wavy hair tends to like a lot of water, water is heavy, especially when you’re adding in moisturizing products. The more water in your hair, the more you’re diluting your styling products and reducing hold.
Plus, if you’re experiencing hair that falls quickly or if you’re struggling to get a cast, you may want to minimize the water you use during your routine. Try a little bit less water and see if you can get a better balance of curl clumping and better hold.
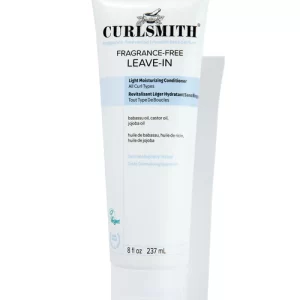
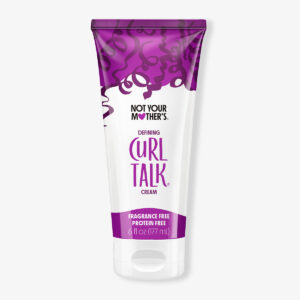
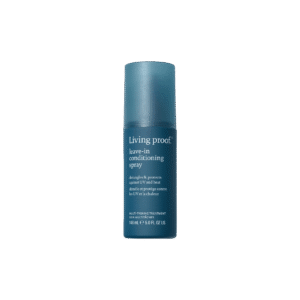
Today I’ll be using the Curlsmith Fragrance-Free Leave-In underneath of my gel.
Normally, when I talk about getting your hair to last, I recommend skipping this step. But, since this product is lightweight, it should give you just the right amount of moisture without weighing down your waves and loose curls. It contains a few oils and butters such as castor seed oil, babassu oil, murumuru butter and shea butter but I find it to be formulated to still be fairly lightweight.
If your hair is very fine, then you can consider skipping this step or use it very sparingly. I like to brush it through to ensure it’s evenly distributed and smoothed out.
This step is the most important because if you’re using the wrong styling product, or just using a cream/leave-in, your curls are going to fall after just a few hours and definitely not last until the next day, requiring so much refreshing.
When looking for products which will give you long-lasting results, typically you want to avoid ones that are very slippery and soften the hair. I often use those because my hair is medium-coarse and feels brittle and stiff, so I look for softening products.
However, when you’re struggling with hair that falls easily and doesn’t hold, you want more grit in your products. Grit is that sticky, tacky, texturized feeling that some products leave in your hair. This gives it some grip and can also increase your hold, especially in hair that falls straight easily.
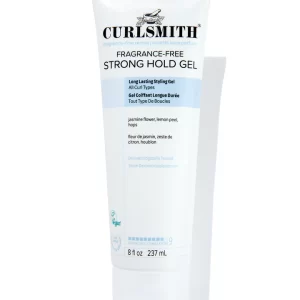
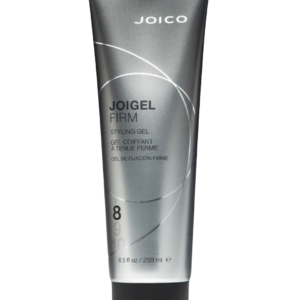
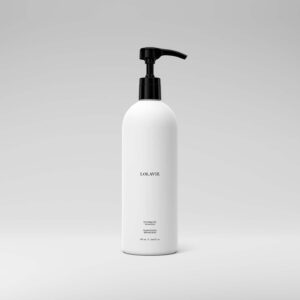
The Curlsmith Fragrance-Free Strong Hold Gel (formerly Shine Gel) has a thick texture with noticeable grit. It offers strong hold (level 9), long-lasting frizz control, and is anti-humidity. It has little to no slip, so it needs to be emulsified with water during application, but it reactivates well with water. Dermatologically tested.
If you are having trouble finding a gel to give you any hold, this is one to try. It’s usually my go-to for my clients who are struggling with all gels just being too soft because it truly gives a hard cast that lasts.
Since the Fragrance-Free Strong Hold Gel is a thicker gel, I like to mix it with a little water to help it spread better. If you’re already styling soaking wet, skip this so you don’t reduce the hold too much. With this gel being thick, you may not be able to brush style with it in your hair. It will just depend on how much water and slip you have. Brushing with the gel in will give you more of a full coverage application for maximum hold.
However, I decided to change up my usual routine today because I wanted to get less coverage for a softer, less “wet look.” Instead, I brush styled with just the leave-in in my hair, then scrunched in the gel.
I love brush styling because it increases the longevity of my hair and prevents it from looking stringy after wash day. You don’t have to do anything too complicated, just brush through in sections with a bit of tension. The more defined your curls are, the longer they will last.
If you saw the video I did on High vs. Low Manipulation Routines compared, you will see how much of a difference that styling my curls to their full potential (high manipulation) makes in terms of longevity. When I put some effort into styling, such as brush styling and finger coiling, my curls last and do not require much refreshing at all. When I don’t do styling techniques and just rake and scrunch, my curls are frizzy the next day.
When aiming for a long-lasting routine for your waves and loose curls, it’s also important to reduce water weight. So you’ll want to microplop – take your towel and scrunch your hair gently to absorb the excess water and reduce your dry time.
This step is especially important if you styled soaking wet or if you plan to air dry, although I don’t recommend that and I’ll share why in the next step.
After microplopping, adding in an extra layer of the Curlsmith Fragrance-Free Strong Hold Gel will significantly increase your hold level because the hair is more dry. Since this is a thicker gel, I again want to mix in a little water to make it easier to apply and so I don’t apply too much. Gently glaze over and crunch it in so you don’t disturb the waves and curl clumps. You can skip this step if you find that you get too much hold with this gel, or if you applied too much product.
This is another one of the most important steps if your waves and loose curls are falling quickly. Air drying will result in more elongated waves, whereas diffusing freezes the curls in place and sets your cast, reducing frizz.
The heat will also help to set the curl shape so it lasts longer. You can plop your hair over a flat surface and then hover, or go straight to scrunching with your diffuser. If you removed some water before diffusing, this should not take more than 30 minutes if you have a good diffuser.
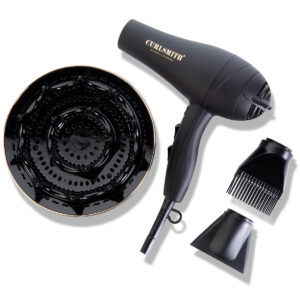
I recommend the Curlsmith Defrizzion + XXL Diffuser because it dries the hair fast using less heat. There are air holes in the prongs of the diffuser head so the hair reaches the roots.
Get your hair as dry as you can to prevent the curls from falling. If you’re short on time, you could finish air drying after the cast is set.
Usually after diffusing, people will use an oil to scrunch out the cast. However oils are meant to soften the hair, and that’s what we want to avoid when aiming for long-lasting waves and curls.
Use your dry hands to scrunch out the cast, or leave the cast in if you really want your waves and curls to last longer. The longer you leave it in the cast, the longer your hold will last.
Because the Curlsmith Fragrance-Free Strong Hold Gel has some of that texture and grit, my roots are not feeling overly silky. If they were, I could add some of the Curlsmith Flawless Finish Flexible Hold Hairspray which is alcohol-free, so it’s not drying.
I’m loving how much more softness and fullness I have on Day 1 with this routine from changing up my gel application technique. Instead of brushing with the gel in, I scrunched it in after brush styling, which reduced the coverage slightly. I typically recommend a full coverage of your gel for max longevity, but when using a very strong hold, thick gel like this Curlsmith one, it can give that very defined, wet look on day 1. It always softens up perfectly on day 2, but if you want to prioritize a softer look on day 1, this is a great alternative. I did have slightly more frizz than when I use my typical routine, but I preferred the look more.
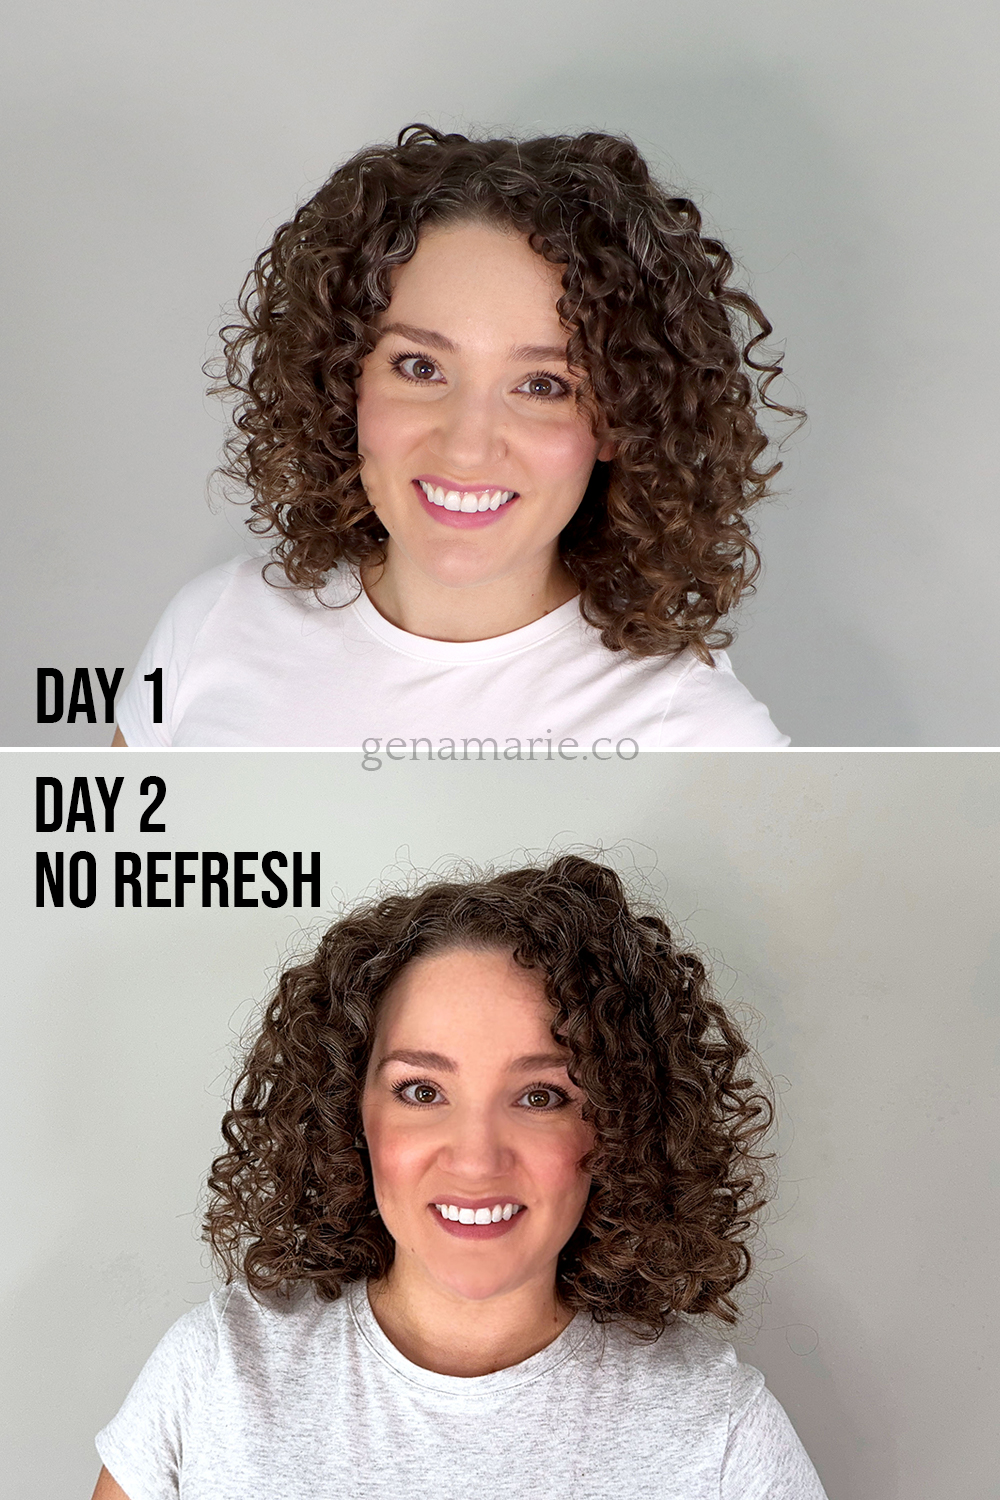
My next-day results look great without any refreshing! I naturally have more frizz, but I consider this “normal” frizz. It’s slightly more than when I brush my gel through but I’m loving the added fullness and volume. It’s also very clumped, so I did a dry refresh, separating large clumps and situating the hair.
Overall, I think this new line is great, especially the gel, which gave me the long-lasting hold I was looking for – all without any fragrance! So, I definitely think these products would work well for someone who has a sensitive scalp, allergies, migraines, or overall scent sensitivity.
If you struggle with any of these things, give this routine a try and let me know your results in the comments!
If you struggle with getting more longevity out of your curls and knowing what products will work for you, I would love to assist you further in my curl coaching program, now open for enrollment through the end of June. Reach out to me to determine if you’re a good fit and we’ll chat!

If your curls aren’t curling up the way you want and you’re starting to feel frustrated or ready to give up, it’s probably not your
If you’ve tried “strong hold” gels but your curls still don’t last, you’re not alone. Strong hold isn’t one-size-fits-all. Some gels are higher in texture
Feeling discouraged, frustrated, or unsure whether wearing your naturally curly or wavy hair is even worth it? If you’ve been following this Beginner Curl Series,
If you’re trying to wear your hair curly and you feel like you’re doing everything right but your hair still doesn’t look how you want,
Notifications