


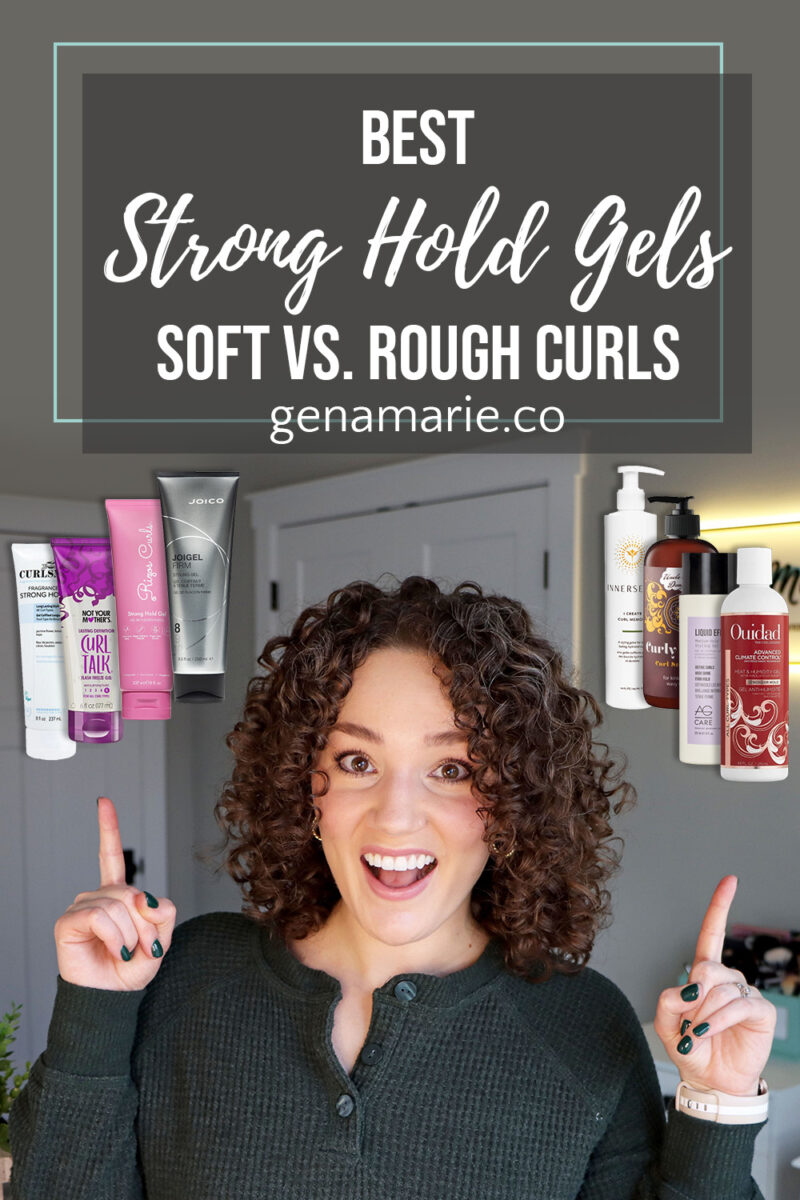
Best Strong Hold Gels for Curly Hair | Soft vs. Rough Finish
If you’ve tried “strong hold” gels but your curls still don’t last, you’re not alone. Strong hold isn’t one-size-fits-all. Some gels are higher in texture
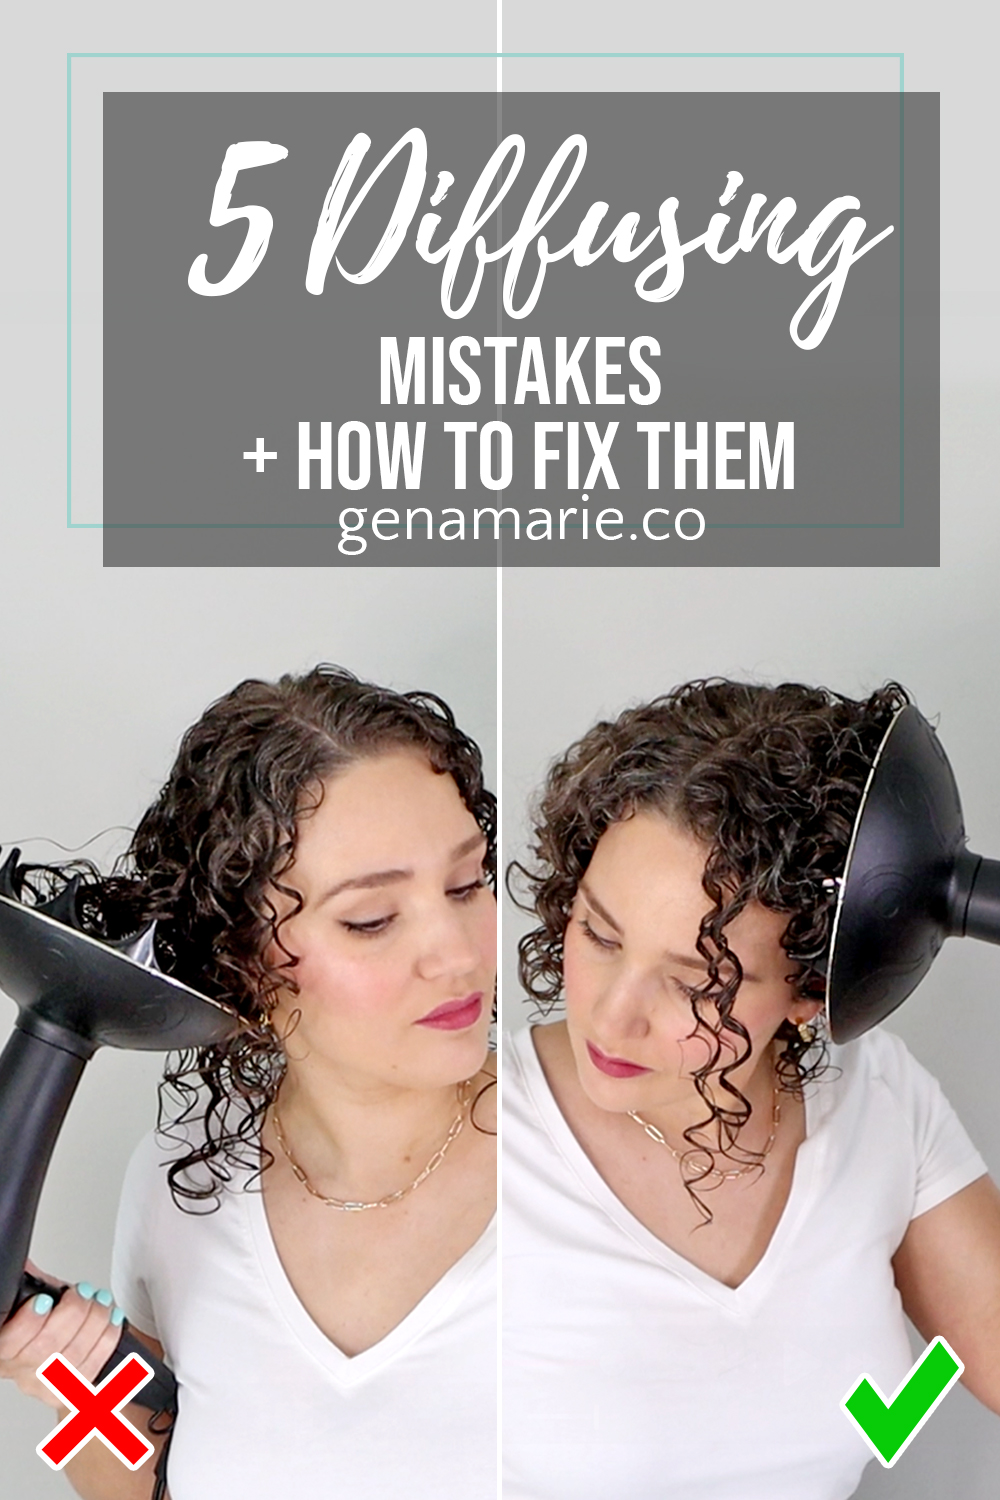
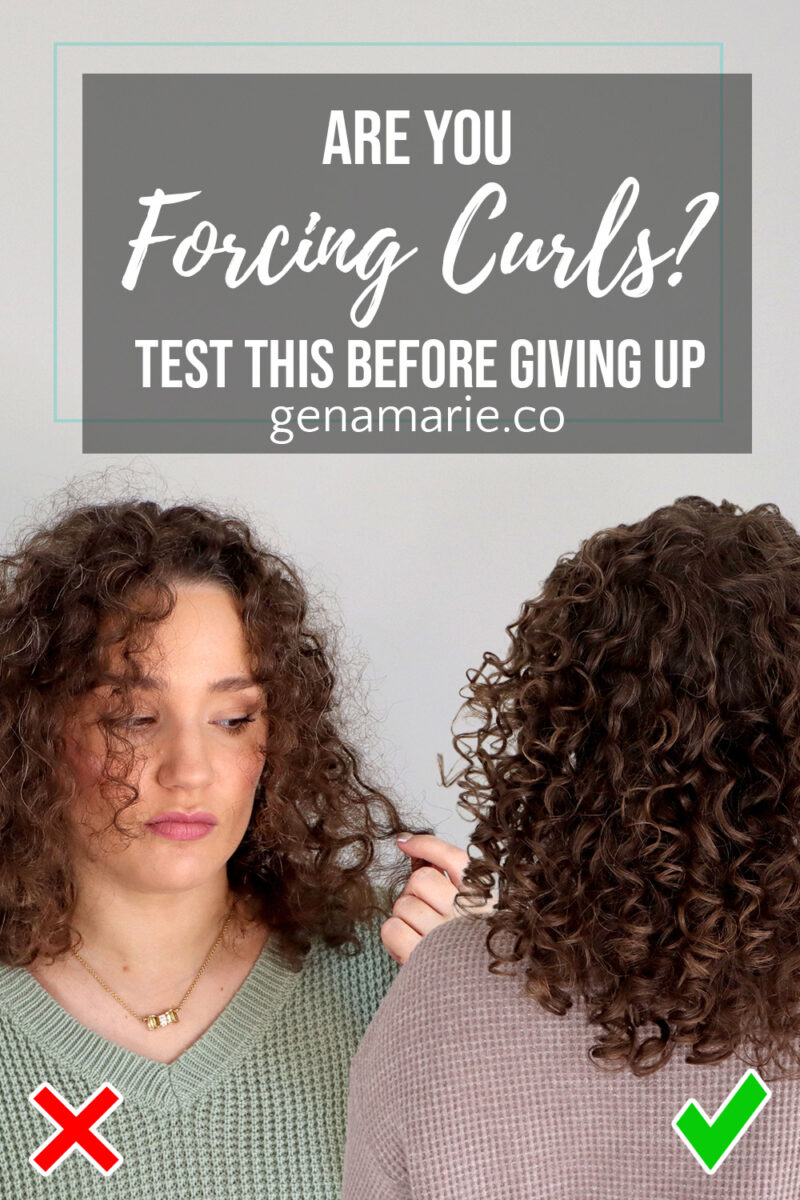
If you’re still getting frizz, flat roots, or wonky curls after diffusing… you’re probably making one of these common mistakes. Here I show you a side-by-side split test to show you exactly what’s going wrong when you diffuse — and how to fix it. Can you spot the difference?
Here we talk all things curly — simplifying your routine and problem-solving so you can get consistent results.
I’m also a curl coach, and one of my favorite things is watching clients style and diffuse in real time so I can help them make the small tweaks that lead to big changes.
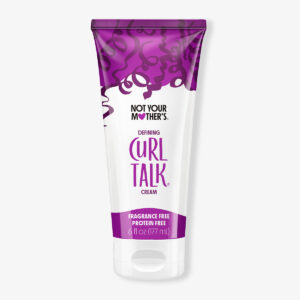
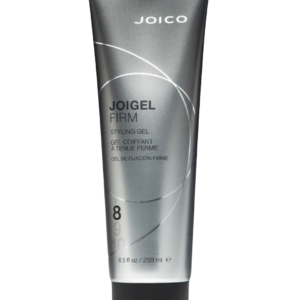
For this routine, I am testing out a new gel for me, the Biolage Styling Gelee. I applied it on sections on clean, damp hair. I did my usual styling routine including brush styling, finger coiling along the top section, and praying hands at the end to clump the hair. My review and final thoughts on this gel are at the end of this post.

Starting to diffuse on soaking wet hair can actually slow everything down and weigh down your curls. All that extra water pulls your pattern downward, which means less bounce and more elongation.
I generally recommend styling damp, evenly wet hair. But, if you get better results when you style soaking wet hair, the microplopping technique is an important step to take before starting to diffuse.
So before you reach for the diffuser, take a minute to gently scrunch with a microfiber towel or cotton T-shirt. This helps remove excess water without disrupting your curls too much.
And don’t worry — if you feel like you lost some product in the process, you can always smooth a light layer of your styler back over the surface. This will also give you extra hold because now you have a layer of gel on drier hair. If you’re getting a ton of frizz when you diffuse, don’t skip this step.
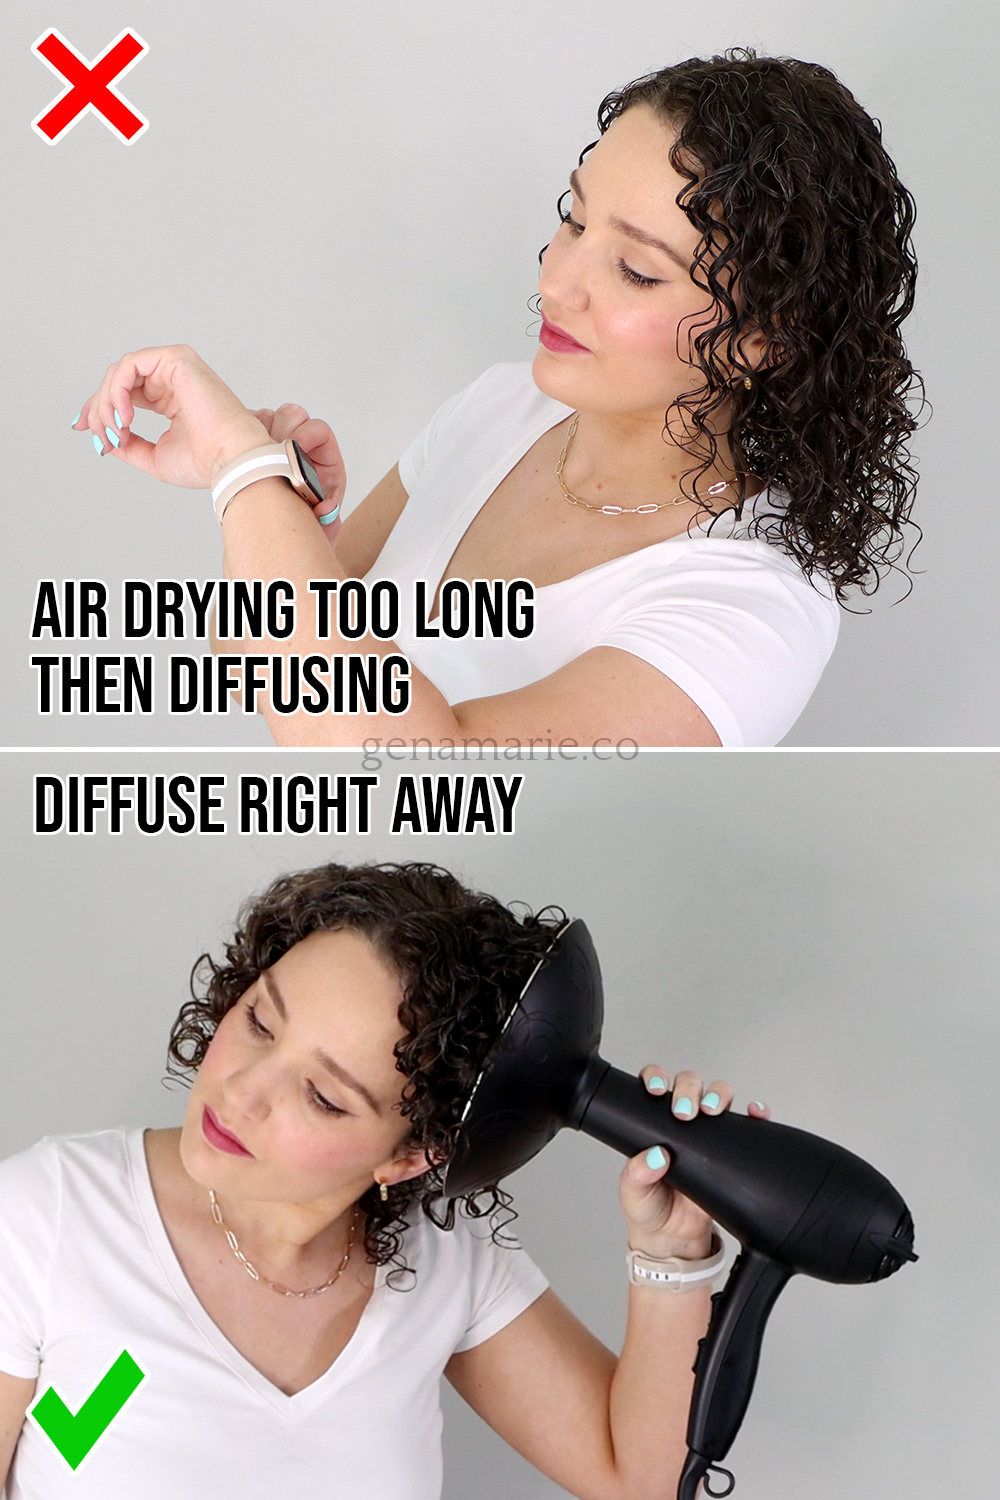
The next mistake is air drying too long before you diffuse, if your goal is curl enhancement. Instead, diffuse right when you’re done styling. If you wait too long to start diffusing, your waves and curls begin to set in whatever state they’re in – whether that’s frizzy, stretched out, or uneven; and that can make it harder to define your curl pattern later. Air drying first can also create frizz due to friction, movement, etc.
Now, if you want a more elongated look, air drying first is totally fine! But if your goal is maximum curl definition, bounce, and shrinkage, it’s best to start diffusing right away.
I personally like to start with scrunch diffusing to get maximum curl formation. But if that tends to cause frizz for you, try hover diffusing for the first minute or two. That helps set the cast and reduce frizz – then go in with scrunch diffusing to enhance the curl shape.
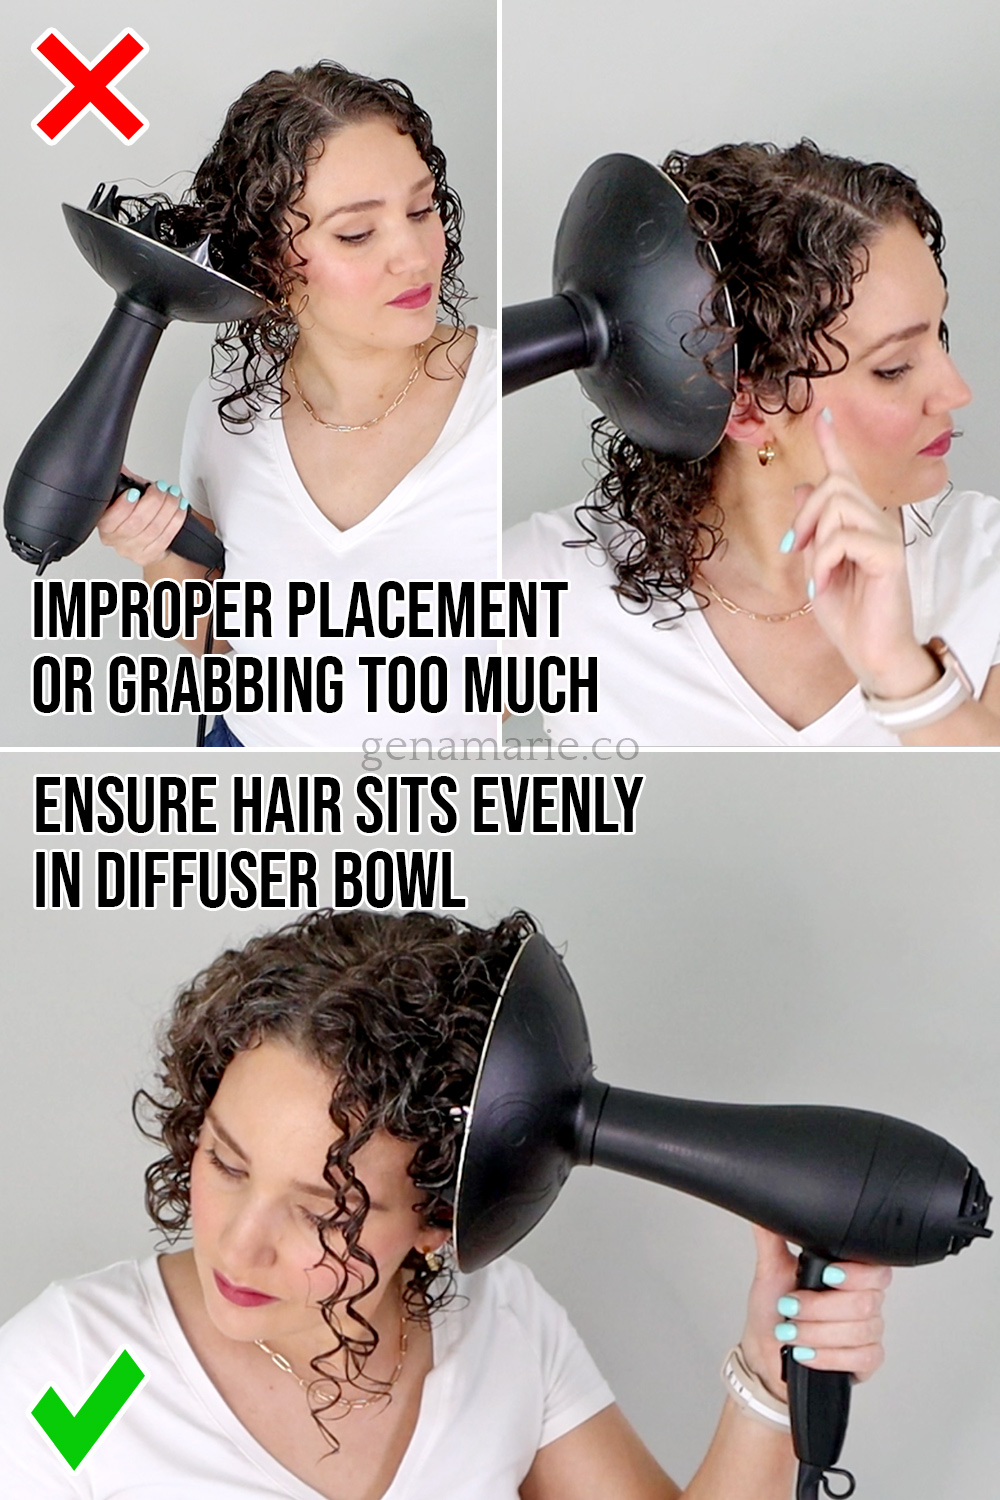
This is one of the most common mistakes I see during guided group coaching sessions:
A lot of people do not pay close attention to how the hair is getting placed in the diffuser bowl, or they gather too much hair. That can bend or stretch your curls and cause them to dry in strange, uneven shapes.
Instead, always start by placing the ends of your hair into the diffuser first. Let your curls naturally coil or gather into the bowl. Then gently lift the diffuser toward your roots, making sure the hair gets scrunched evenly towards your head. You don’t want the hair to be spilling out the sides or getting flattened. If you do see where there are hairs not properly placed, lower the diffuser and re-place your hair slowly.
You can also turn off your hair dryer as you place your hair, then turn it on. This “pixie diffusing” technique often helps my wavy and long-haired clients. And if you have long or thick hair, it’s important to diffuse in sections. That helps avoid overloading the diffuser and gives you more even, defined results.
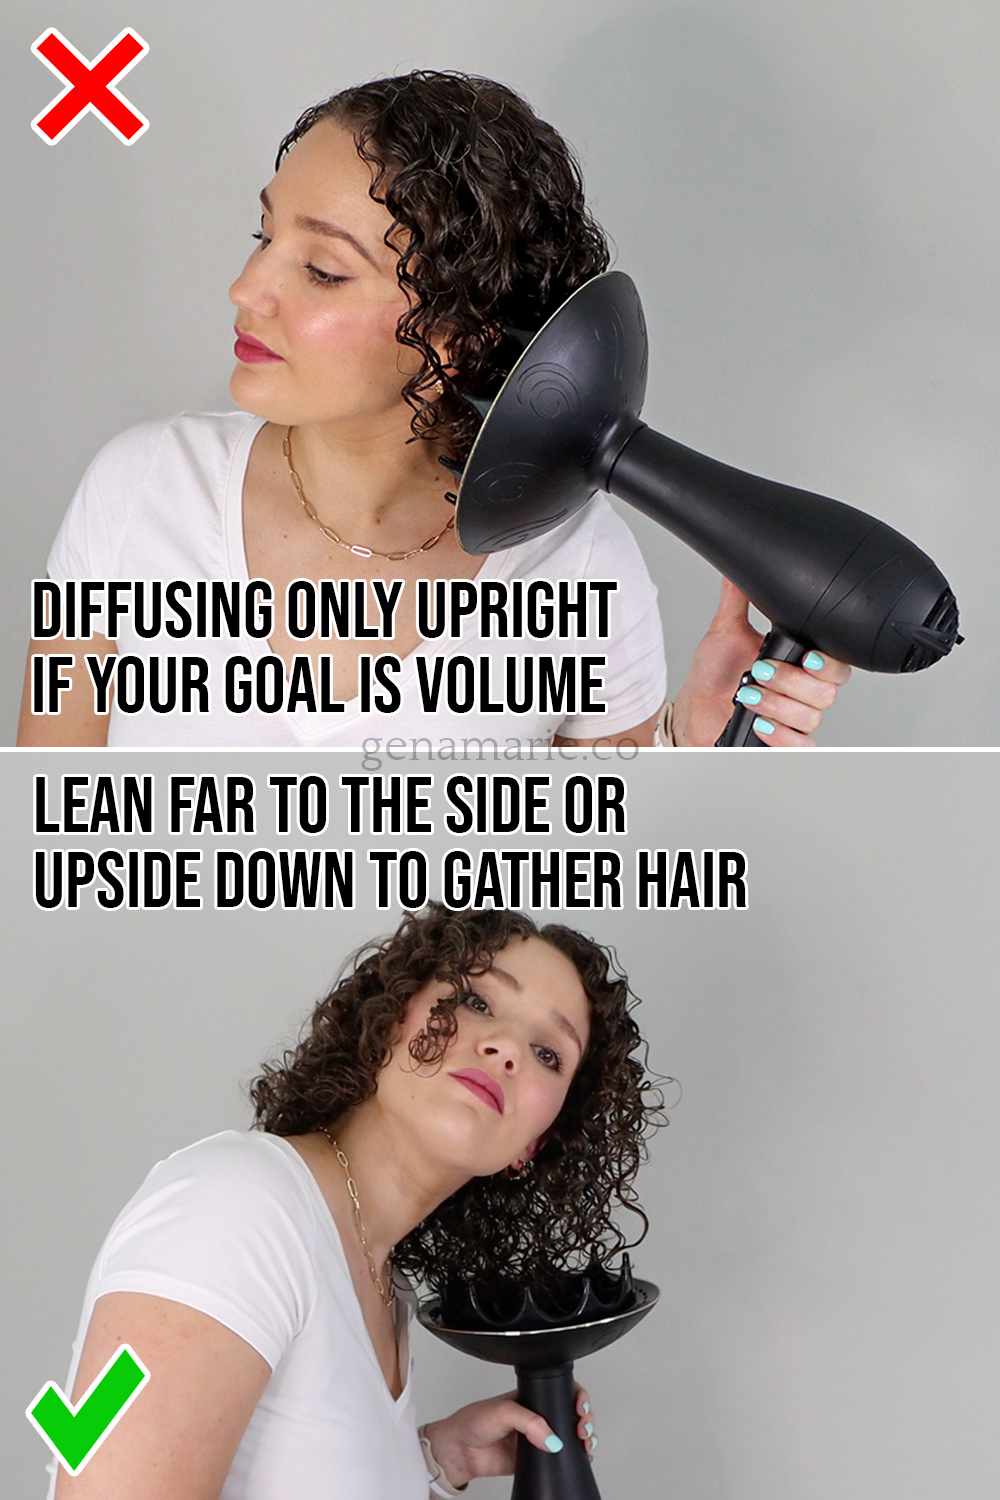
Diffusing while standing upright allows gravity to pull your curls straight down, which leads to flat roots and less lift overall. This is something I see with my clients and usually the reason they feel disappointed with their volume or end up with frizz.
Pointing your dryer straight up can also lead to frizz because it’s blowing up the cuticle. Instead, try tilting your head forward, to the side, and even upside down as you diffuse. This helps lift your roots away from your scalp and encourages volume right at the crown. The goal is to get the hair away from the scalp.
If flat roots are a struggle for you, flipping your head to each side while diffusing can make a huge difference. Also make sure you are using the prongs of your diffuser to gently lift at the roots while drying – it gives your curls even more height and shape.
Instead of just gathering your ends in the diffuser and pointing it up, point the diffuser towards your head as you press up, so that the diffuser is eventually perpendicular to you. Make sure you’re not creating a bend where you turned it towards your head, and instead let the hair gather. Press the prongs against your scalp and lift up.
You can also start at the mid-shaft or root area and lift the hair up at the roots. This is especially helpful if you have layers. Starting at the mid-shaft will help you target the layers and properly scrunch them from the ends to root for even curls. I usually will do this to enhance the overal shape of my hair.
Remember, the hair will set in whichever position it’s in while drying. This is lifting the roots off the scalp as it sets and dries is key for volume. I usually do this along my part and crown towards the end of diffusing.
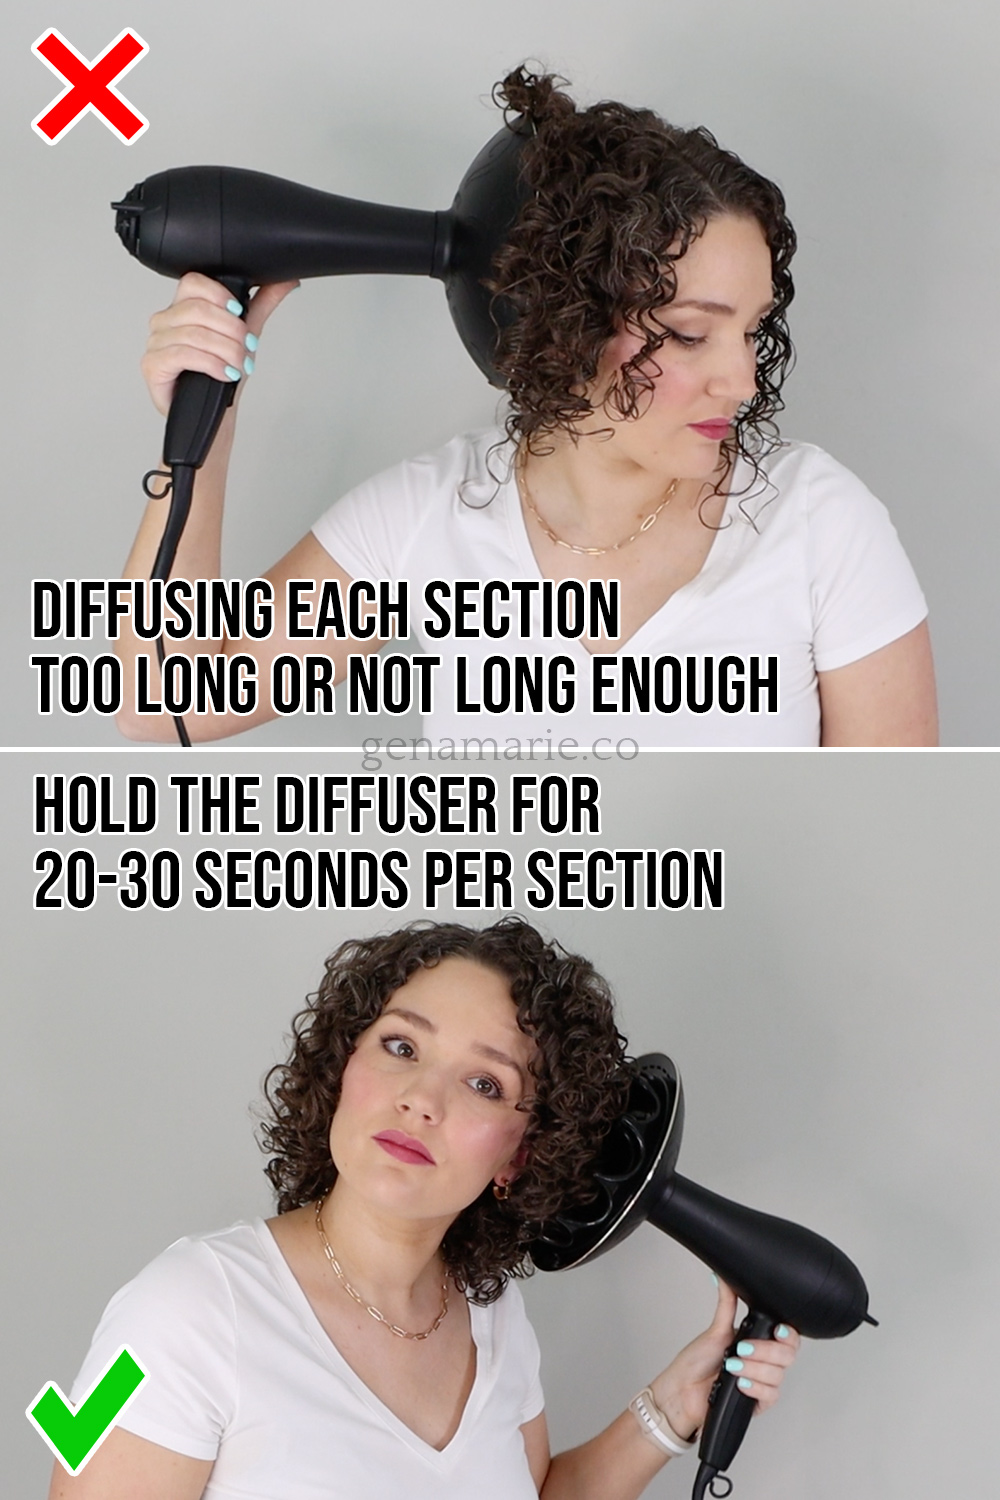
Moving the diffuser around constantly actually prevents your curls from setting. You’re not giving enough time for the styler to set and the waves and curls to form their shape, so you end up with frizz and little to no definition.
On the flip side, holding the diffuser in one spot for too long can cause heat damage and uneven drying, especially if you’re using medium to high heat. This can also lead to wonky curls if you fully dried the section when it was not properly placed.
Instead, you want to find that sweet spot of holding the diffuser in place for about 20-30 seconds per section, enough time to start to set the curl, but not so long that you over-dry or damage the hair. You don’t need to fully dry an entire section before moving on to the next.
It’s ok if all your hair doesn’t fit in the diffuser, just make sure the hair beside it is separated out and not bent. I like to rotate between sections slowly, gathering sections at a time and working my way around my head. Each section will not get dried to 100%, but I will come back to each of them.
If you’re short on time, you can diffuse for a few minutes and leave the rest damp. But just know that can cause frizz, lack of volume, and flat roots as your hair finishes drying.
Isn’t it crazy what a difference just diffusing technique can make?! If you look at the overall shape, on the “correct” side, my hair has volume and an even shape. This is my preferred shape for my curls. The “incorrect” side has less volume and a more uneven shape. It also has more of that triangle shape, with flat roots and fuller ends. Note: this is just my preference for my hair!
I also had a lot more frizz on the “incorrect” side. This was due to holding the dryer in the wrong direction, holding it too long in one area, and more.
There were more wonky-shaped curls and irregular bends and waves throughout my hair on the “incorrect” side. Now, I don’t expect my curls to be perfectly shaped and ringlet-y by any means — that’s just unrealistic. However, I know my curls naturally have more of a curl and spiral to them. Diffusing the correct way helps bring out their full potential.
Unfortunately, this gel didn’t give much hold at all. I had more frizz than usual, even on the good diffusing side. When that happens, I add a little extra gel to smooth down frizz on dry hair, then I fluff out my roots for volume.
Aside from the lack of hold, the gel did provide moisture and curl definition. I also did not care for the smell.
I plan to test it again in the fall or winter when it’s less humid. Until then, it’s not for me!
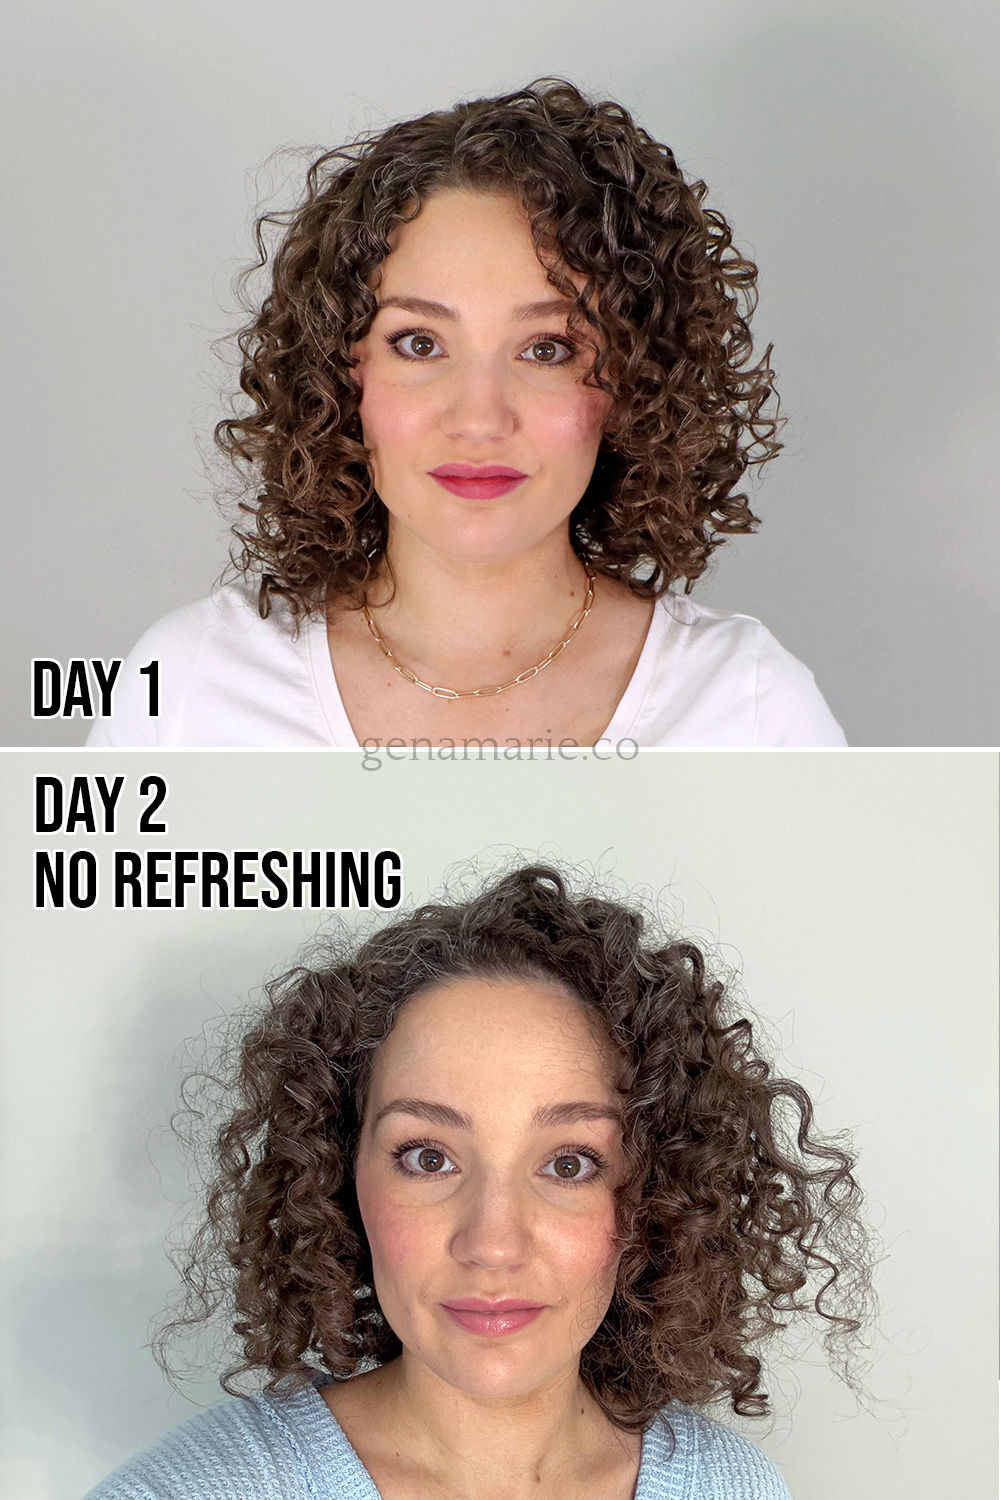
My day 2 results (without refreshing) really showed the impact of proper diffusing technique! Aside from this gel not holding up in my hair, you can definitely tell a difference in the two sides from the different diffusing techniques.
Diffusing doesn’t have to be frustrating or unpredictable. Sometimes it’s these small adjustments that make a big difference in your final results!
Remember, there is no “right” or “wrong” way to do curly hair. This video is meant to show you the cause and effect of certain placements, techniques, etc., when diffusing, so that you can customize your technique to get the results you want.
And if you want more personalized help with your routine or figuring out what your curls need, join the waitlist for my curl coaching program to get hands-on guidance and feedback on your diffusing technique.

If you’ve tried “strong hold” gels but your curls still don’t last, you’re not alone. Strong hold isn’t one-size-fits-all. Some gels are higher in texture
Feeling discouraged, frustrated, or unsure whether wearing your naturally curly or wavy hair is even worth it? If you’ve been following this Beginner Curl Series,
If you’re trying to wear your hair curly and you feel like you’re doing everything right but your hair still doesn’t look how you want,
If you think you might have curly hair but don’t know where to start — or you tried before and your curls were frizzy and
Notifications