


Wavy + Loose Curl Summer Routine That Actually Lasts
If your waves or loose curls fall flat every summer — losing definition by midday, never lasting past wash day — this routine is built
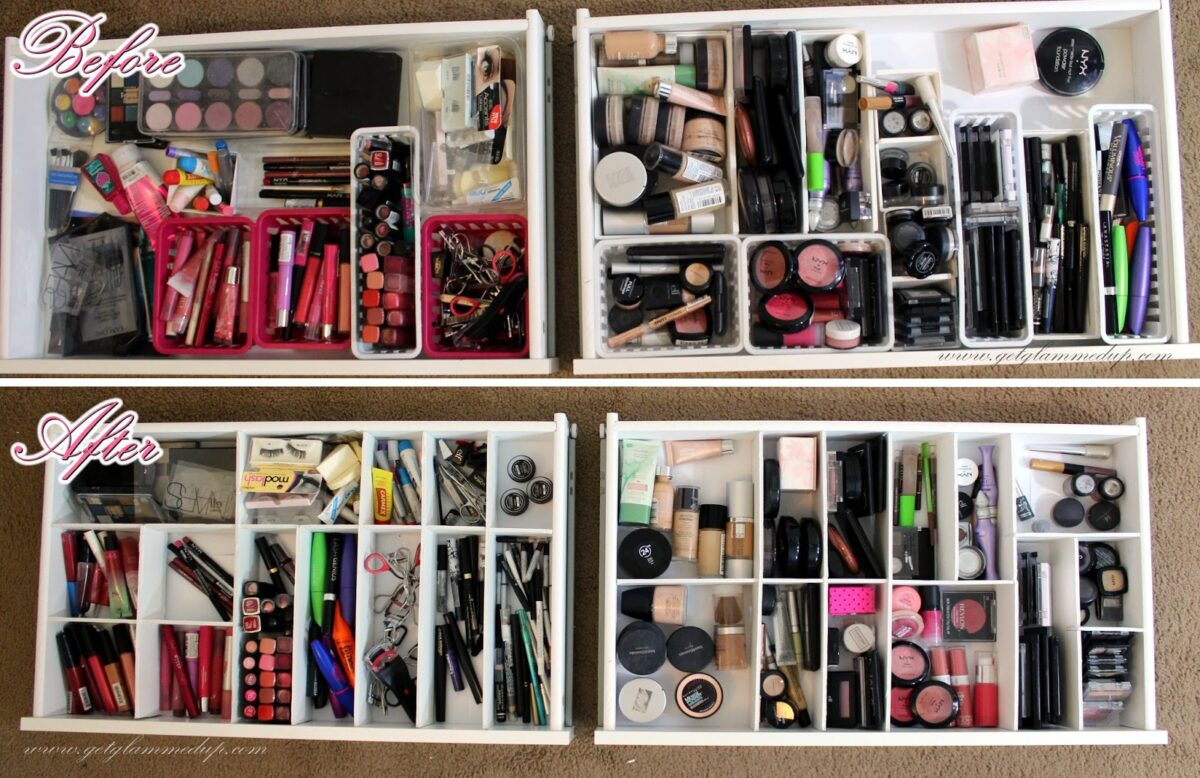
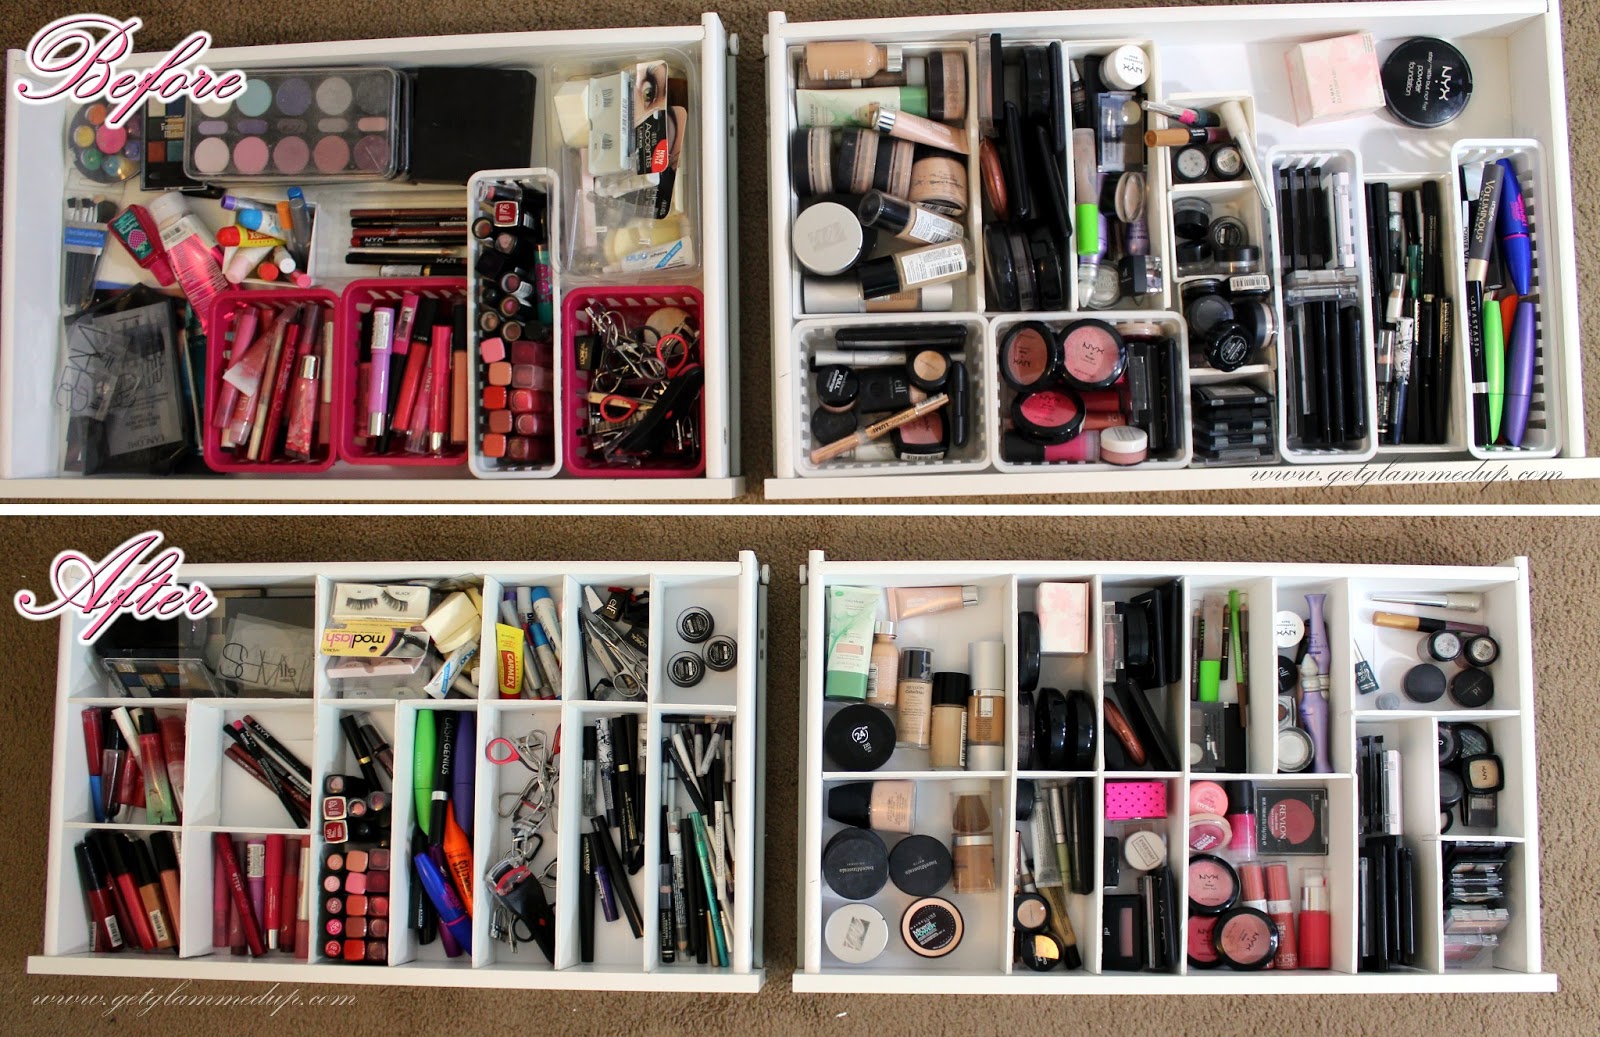
You all know I am a little overly obsessed with staying organized, and every now and then I like to re-amp my storage systems throughout the apartment. My vanity is something I use daily, and when I am pinched for time. Therefore, it is essential to have an organized makeup collection. My Ikea Micke desk has two big drawers that are the perfect depth for storing all my makeup. I have always used plastic drawer containers that I have collected from places like Walmart, Target, and office supply stores. But the problem with these is- the sides don’t go straight down, so there is a lot of unused space in between them. The sizes are also pretty limited. They work great if you don’t have a lot of stuff to store, but a makeup junkie like me needs every inch in those drawers that I can get! My collection was expanding and I was majorly running out of space.
So after searching online for custom drawer dividers, or to have them custom made, it was going to costs a fortune. I didn’t want to spend anymore than about $20 on a new storage system. So I decided to make my own! I am very particular about how my stuff is arranged and categorized, so creating my own was the best solution and the cheapest.
I am going to show you in just a few simple steps, how you can make your own drawer dividers for less than $10, maybe even $5.
What you will need:
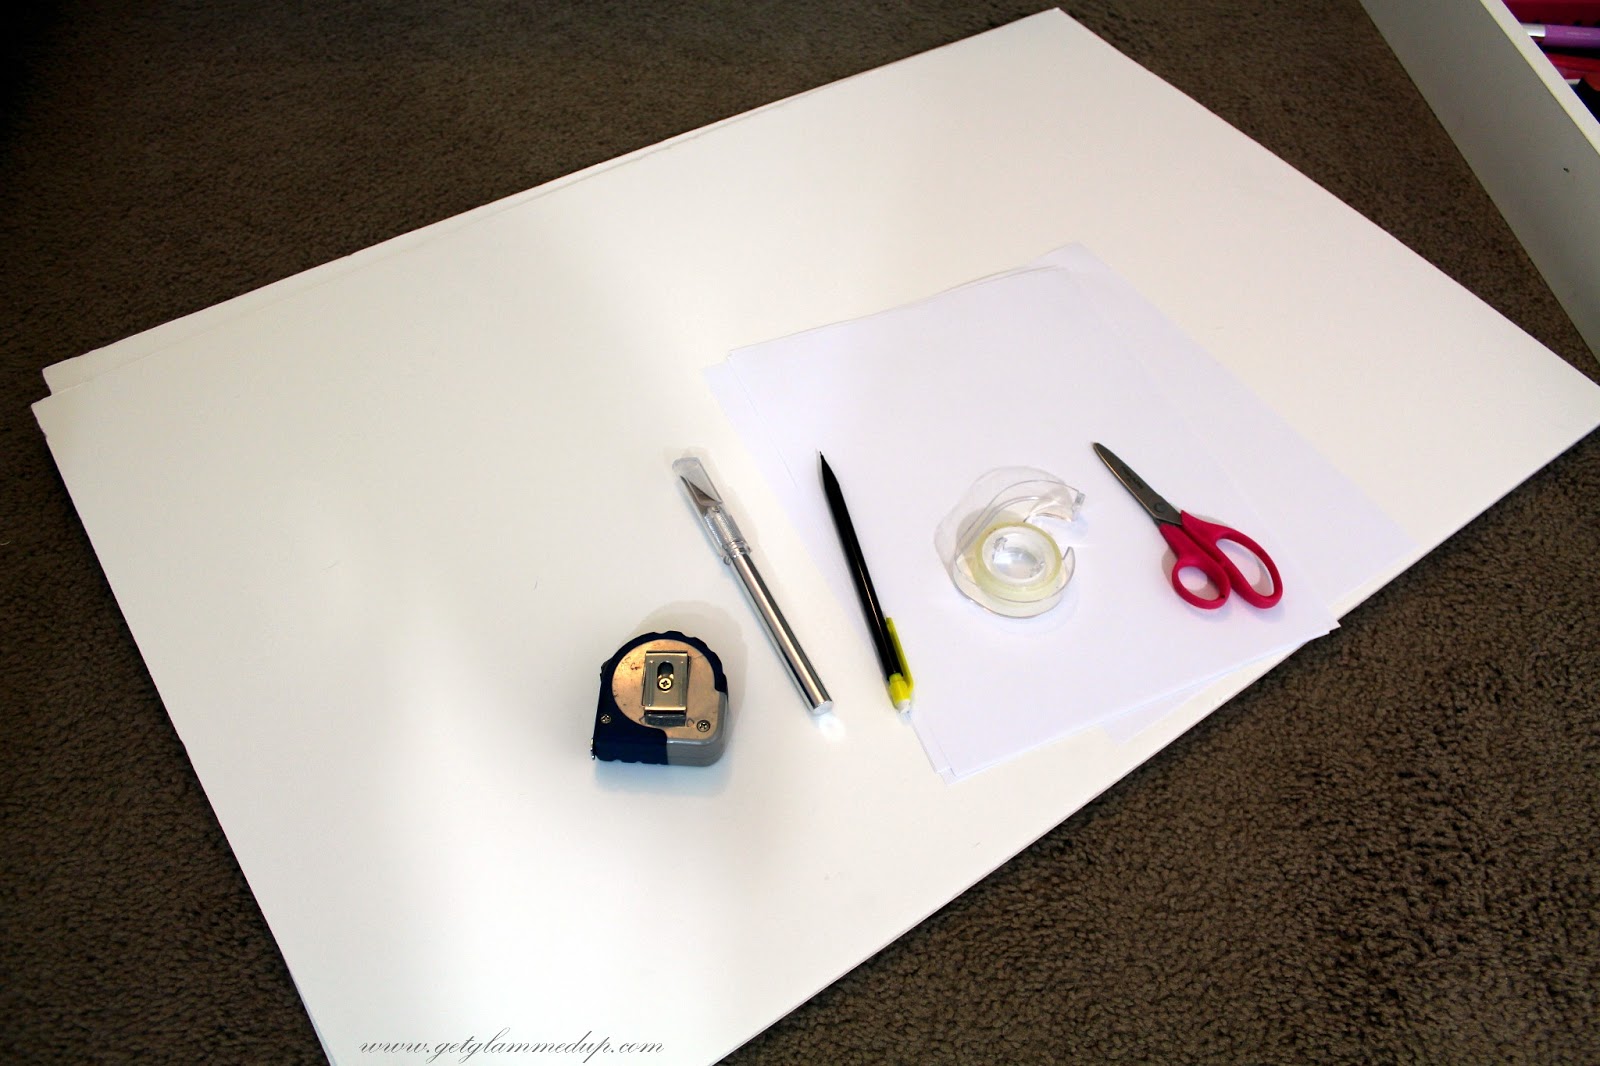
-Foam boards: These can be found at any store where crafts are sold. I found mine at Walmart for about $3.50 each, but you can get them at dollar stores for $1. I recommend getting a color that blends with the color of your drawer (I got white). At Walmart they did have a brown paper color that would match good with wood. I bought 2 so I would have enough. It is also helpful to have to for drawing straight lines.
-Exacto knife: this is optional, but it makes the world of difference when cutting. Scissors don’t make a clean edge and can damage the boards. You could also use a a razor blade.
-Measuring tape: you’ll need this to measure your drawers and for measuring the boards. You can use a ruler too for drawing your lines on the boards.
-Pencil: used to draw the marks and lines to cut
-Paper (optional): I used plain white computer paper to line the bottom of my drawers. I didn’t want any makeup to get on the wood of my drawers. This was also helpful to tape the dividers to for enforcing the edges.
-Scissors: I used these to cut the paper to line the drawers with
-Double sided or regular tape: used to tape down the paper and to enforce the dividers
-Super glue (optional): you can use this to reinforce the joints if you need too (I found that the tape worked better)
Step 1:
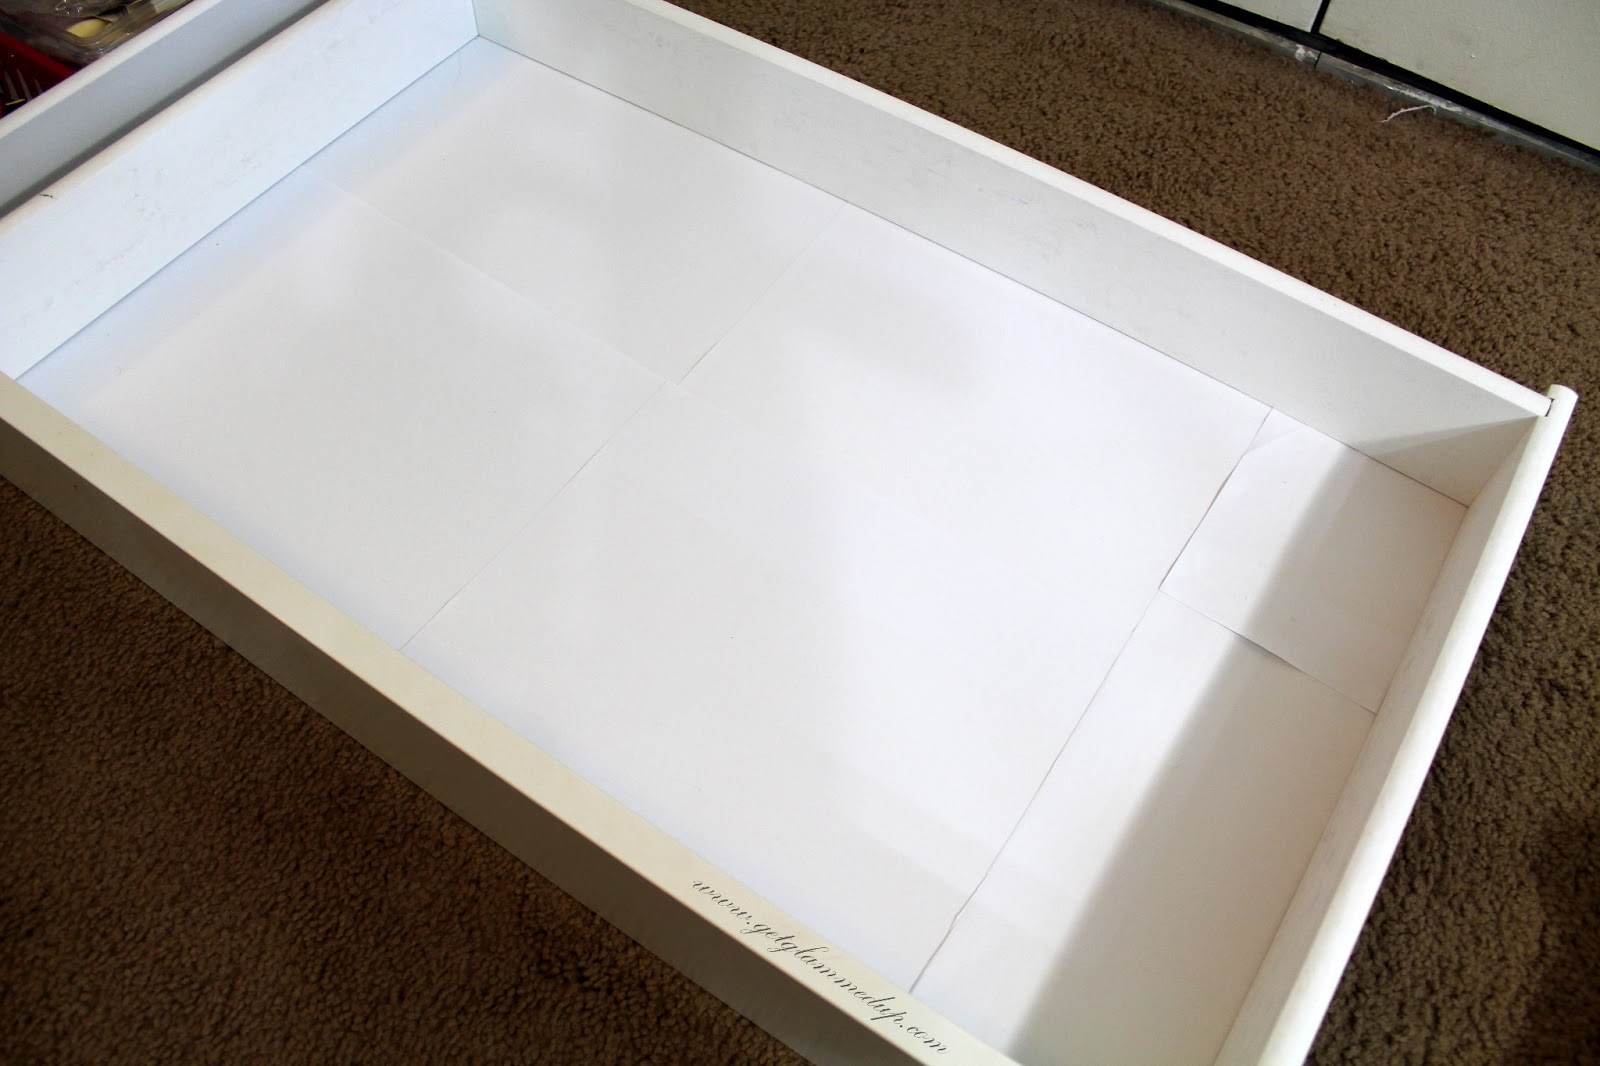
This is optional, but I lined the drawers with regular white computer paper. You could use adhesive drawer liner if you want, but I like the paper since the tape sticks to it better (which is also optional to use). Then I used the double sided tape to secure the paper.
Step 2:
Measure your drawers and write down everything. You want to get the length (vertical), width (horizontal), and depth (how tall). For me it helped to set some of my makeup out of the containers and rearrange it in the drawer the way I wanted, pretending the dividers were there. Then I was able to visualize where I wanted the dividers to go.
Step 3:
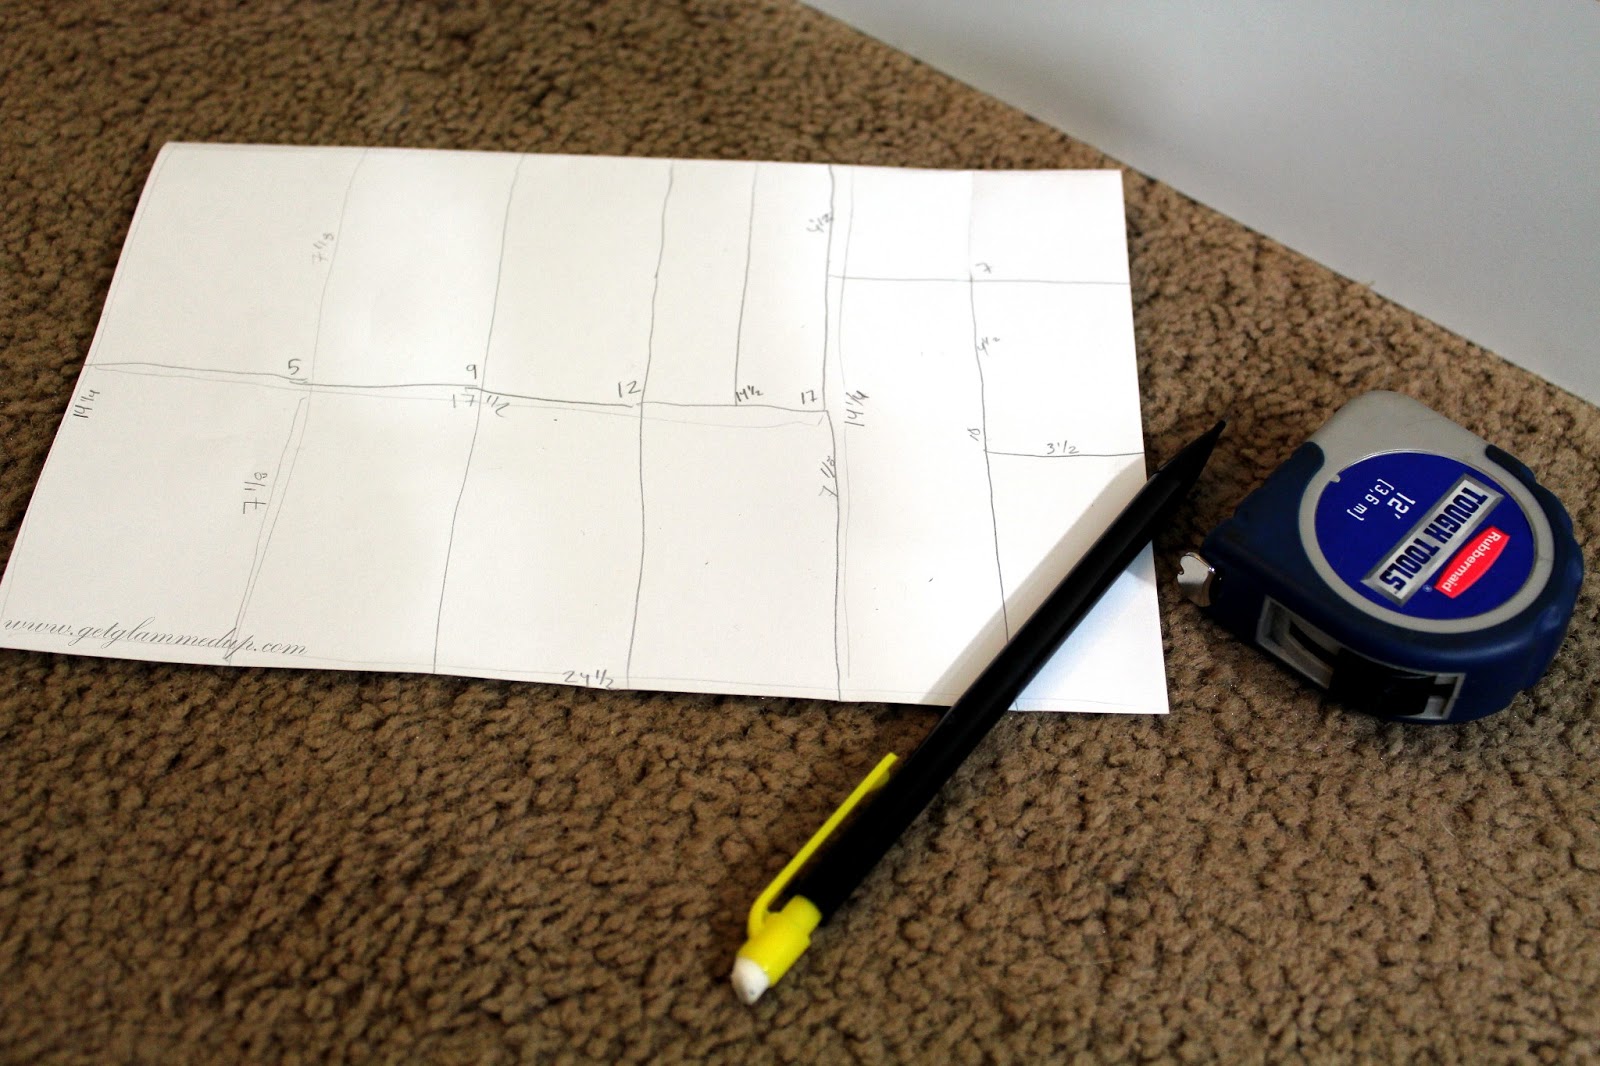
Then on a piece of paper, make a sketch of how you want to design your drawers. Then measure what you want each section to be, and then measure the length of each piece. The easiest way to do it is take the length or width of you drawer, and divide it evenly by the number of sections you want. But for me, I wanted a lot of the sections to be different sizes. So that took a TON of time trying to figure everything out. This took a lot of trial and error. I started by estimating the width I wanted the dividers to be my measuring over the makeup I laid out.
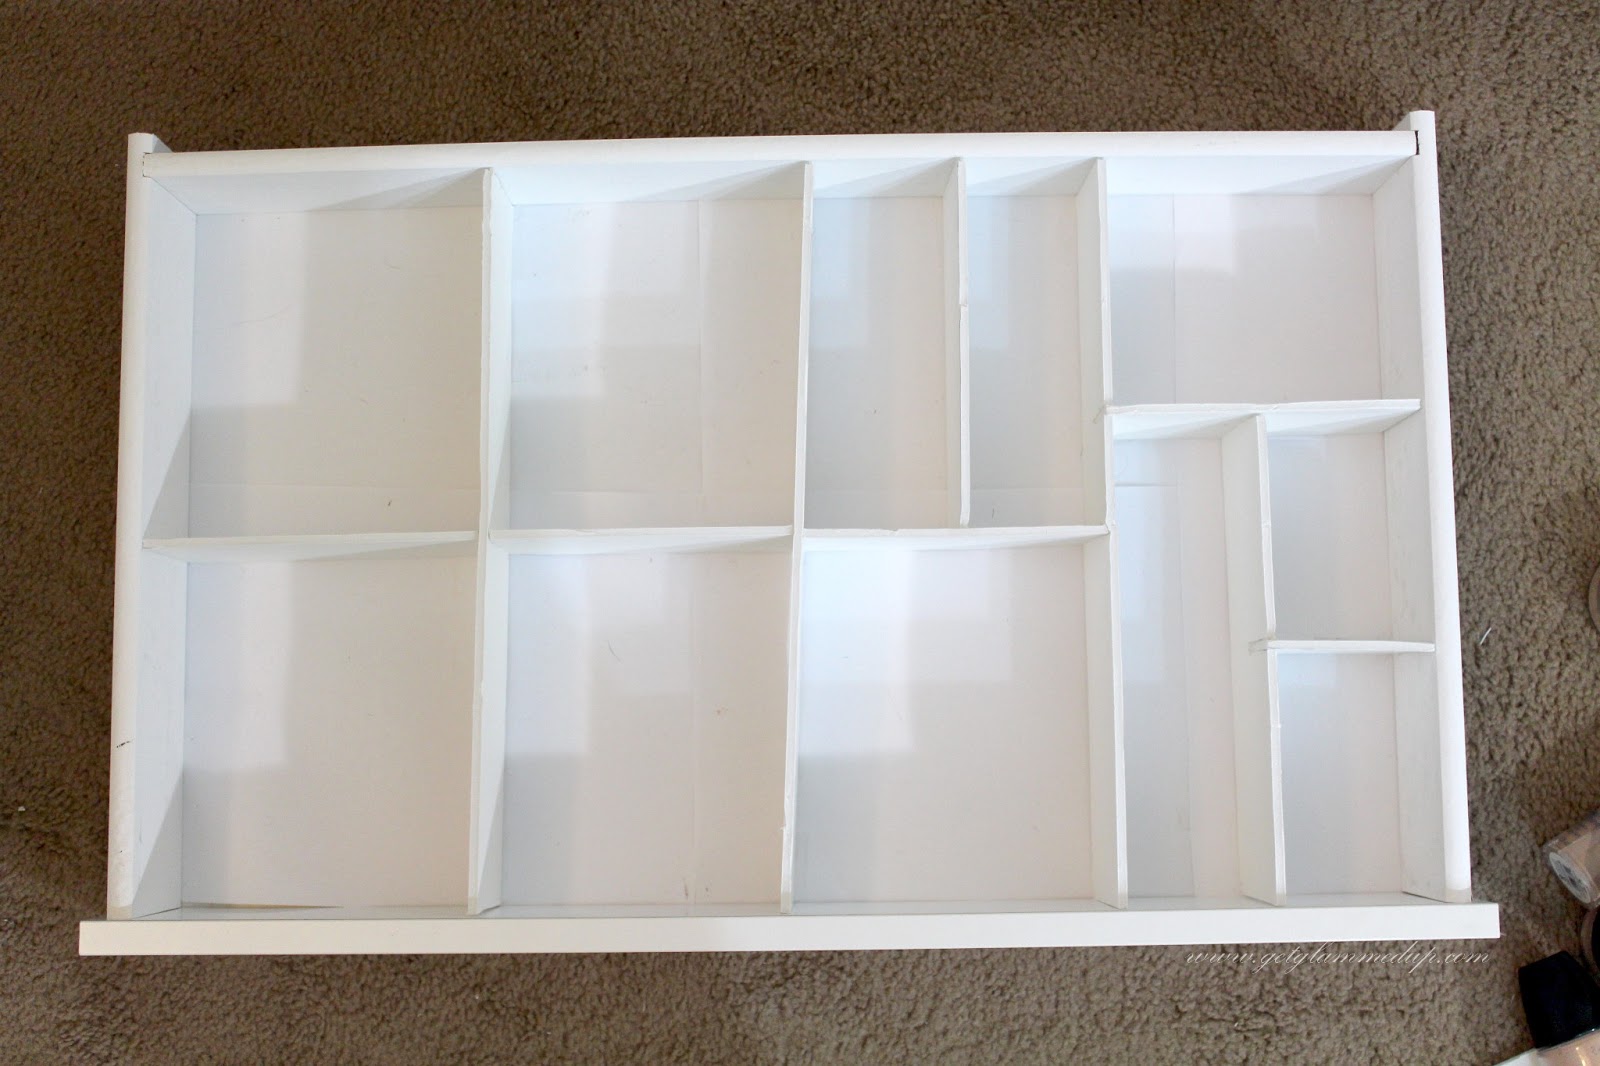
The right drawer I had was divided up into 6 sections, of varying sizes. Then since my drawers were not that wide, I mainly had one divider across the center. Keep in mind that you will not have a piece for every section, just different notches in each piece.
If you look above at my paper, I had one long piece across the middle that stops at the right side. This would have been easier to make one piece that went all the way across, which is what I did in my left drawer. Then I had 4 pieces that were the length of my drawer (the vertical pieces), 1 piece that was slightly shorter than the length, 1 piece that was half the length, and 1 small piece that was the width of one the sections.
The left drawer I made more simple. I had one horizontal that was the whole width of the drawer. Then I had 4 pieces that were the entire length, and 3 pieces that were about a 3rd of the length.
*Keep in mind how far your drawer opens. Since mine is a desk drawer, the drawers don’t easily come all the way out. This is something I didn’t consider enough because the left drawer is hard to access the back section because I put the middle divider to far back.
Step 4:
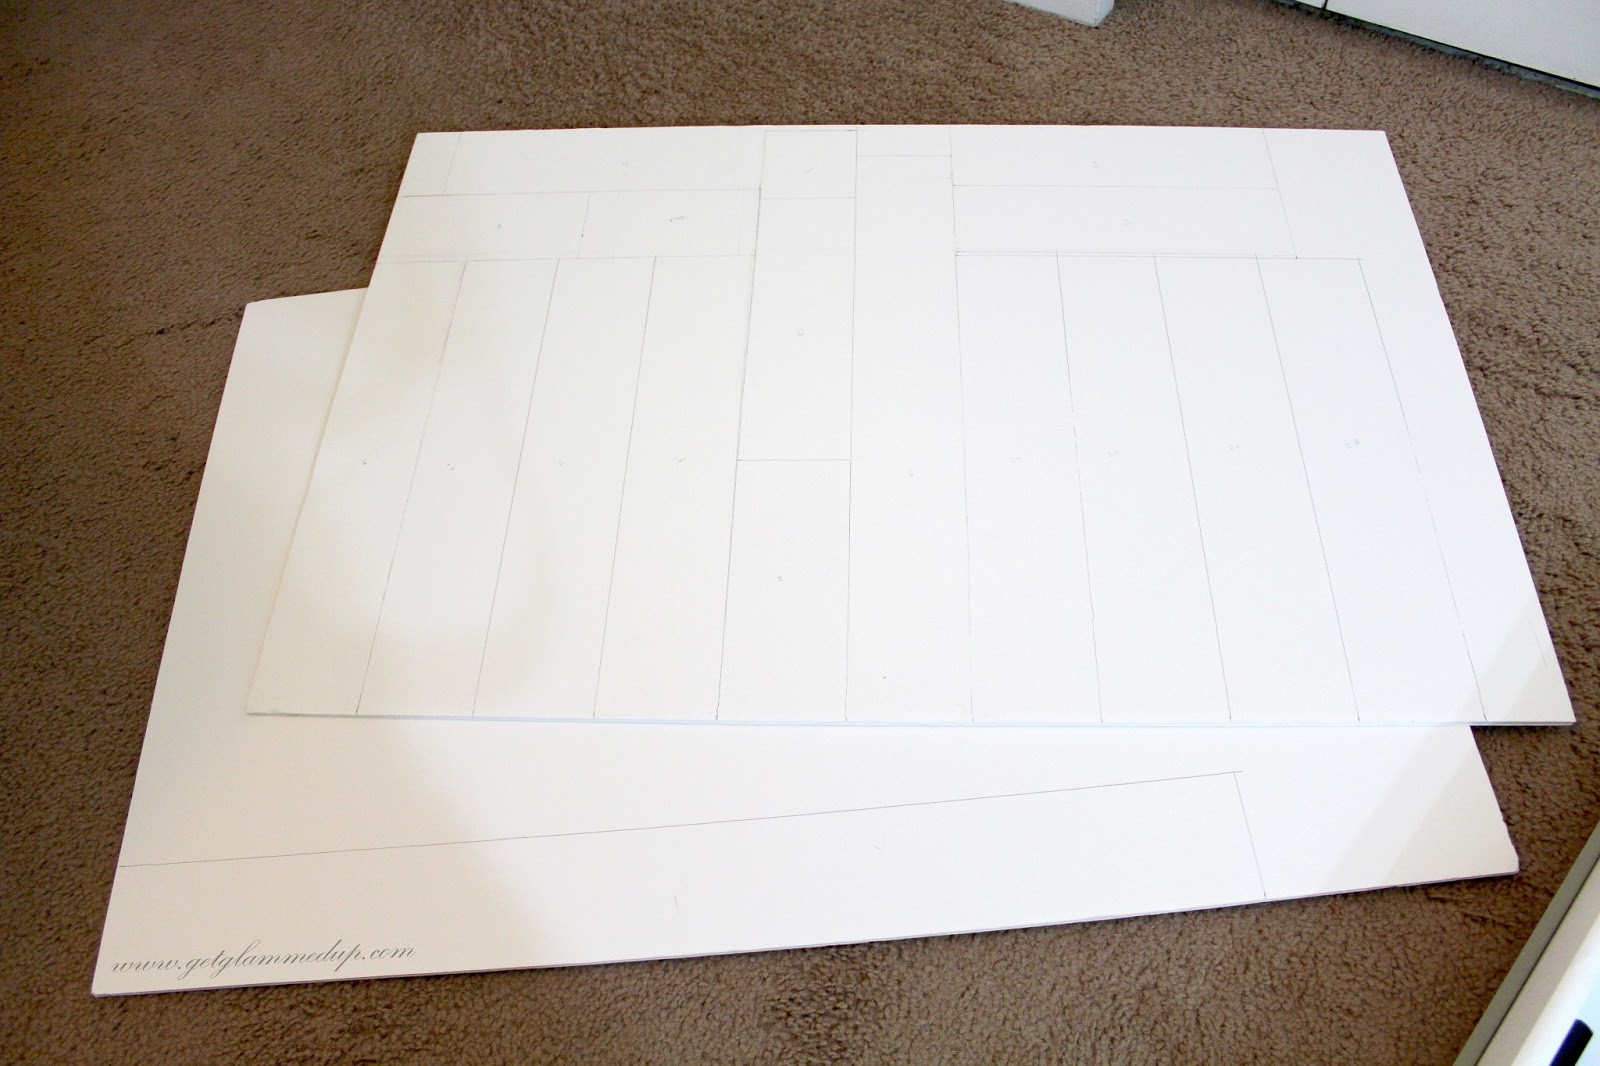
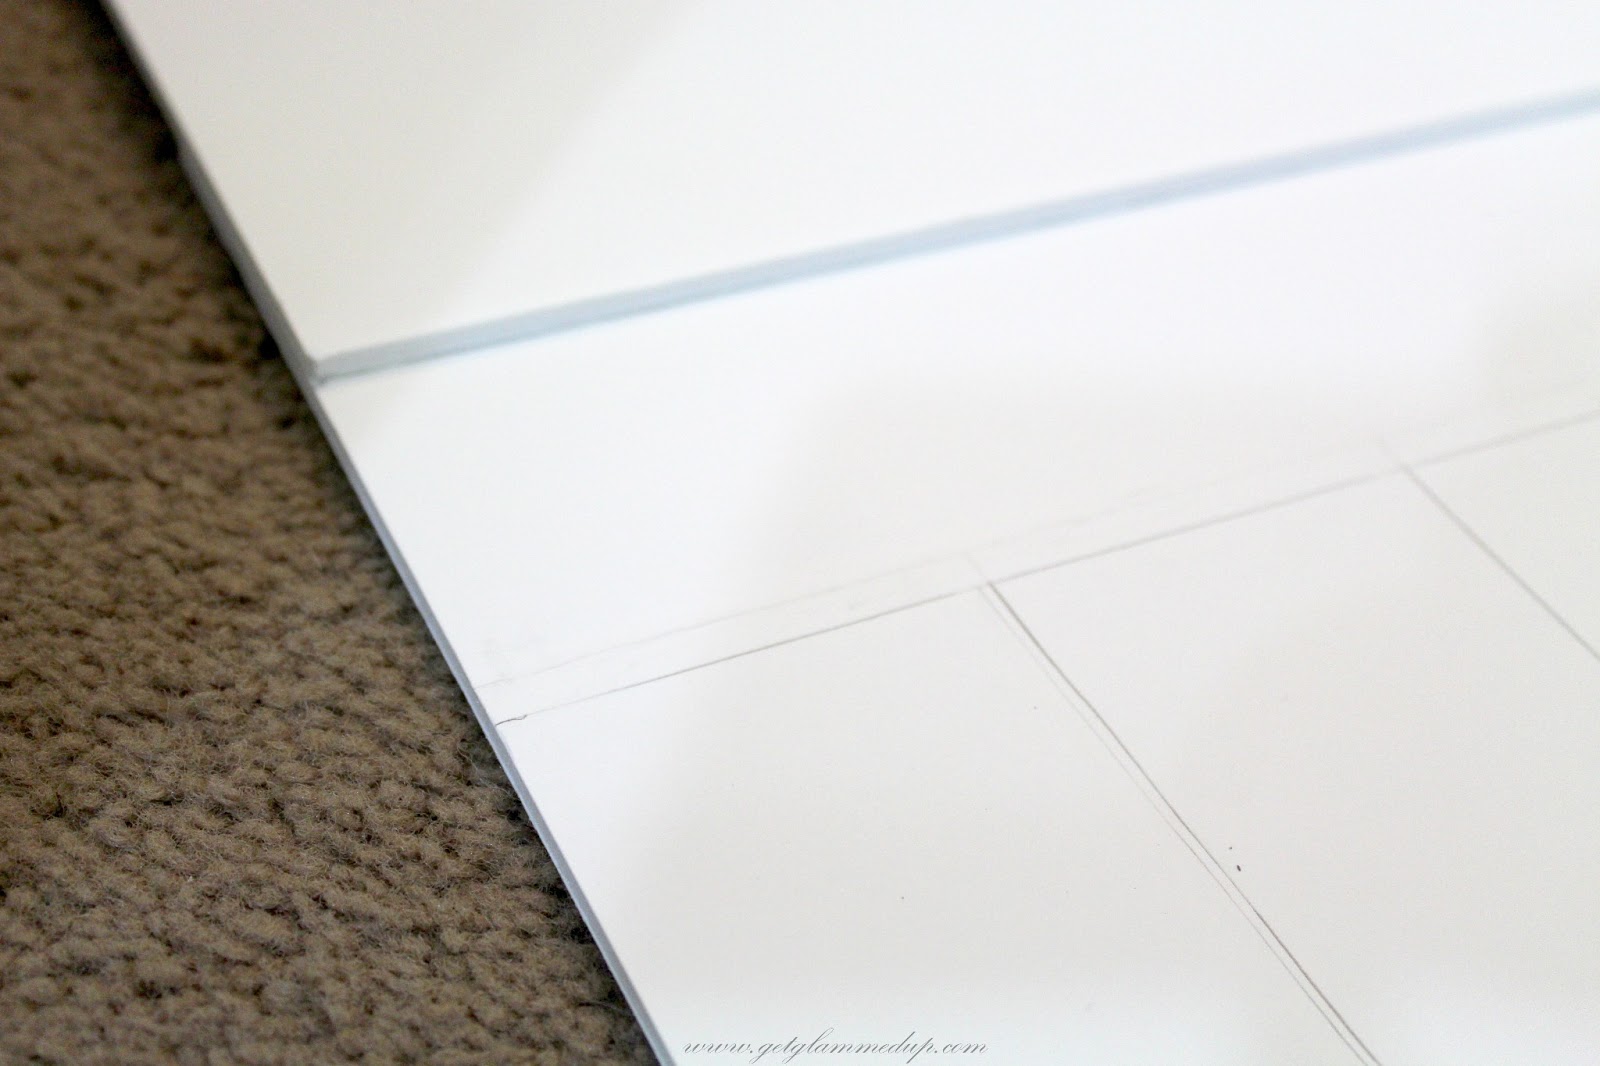
Double check all your measurements. This is so important! I caught errors several times and had to redraw. Trace your pieces onto the board using a light hand so you can erase if you need to. Make sure all the pieces are the same width (the depth or how tall your drawers are). I am glad I bought two boards because it was perfect for ensuring my lines were straight. If you don’t draw and cut straight lines, the dividers won’t lay right in your drawer. Align the edges of the second board on top the one you’re drawing on, making sure all edges are flush. Then use the edge to draw your line. You can use a ruler for this, but it is really hard to make it straight. Again, double check everything before you go cutting! Also, it helps to try to group the pieces close together so you don’t have to cut as much and you won’t end up with a bunch of random scraps.
Step 5:
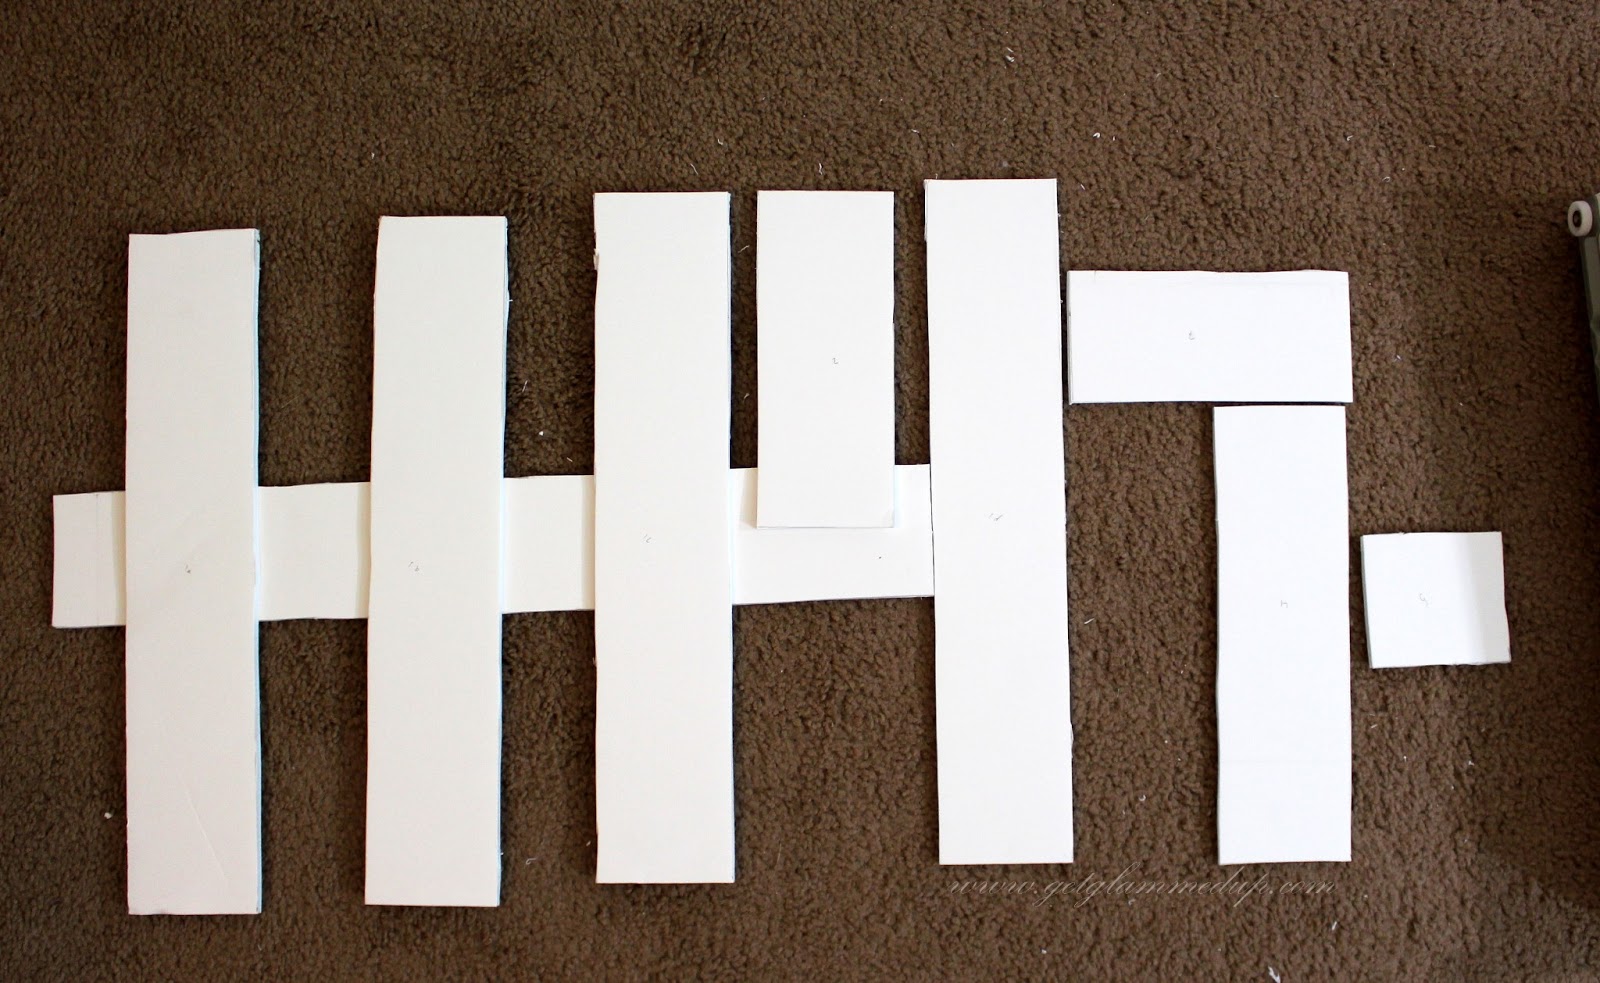
Cut out all of the pieces using the exacto knife. I used a cutting board underneath to protect the carpet I was working on. It may take a few passes until you cut all the way through the board. Then I laid them out on the floor to test out the design. (This picture is missing a piece! I forgot to make it and didn’t realize until the end. Once again, double check everything!)
Step 6:
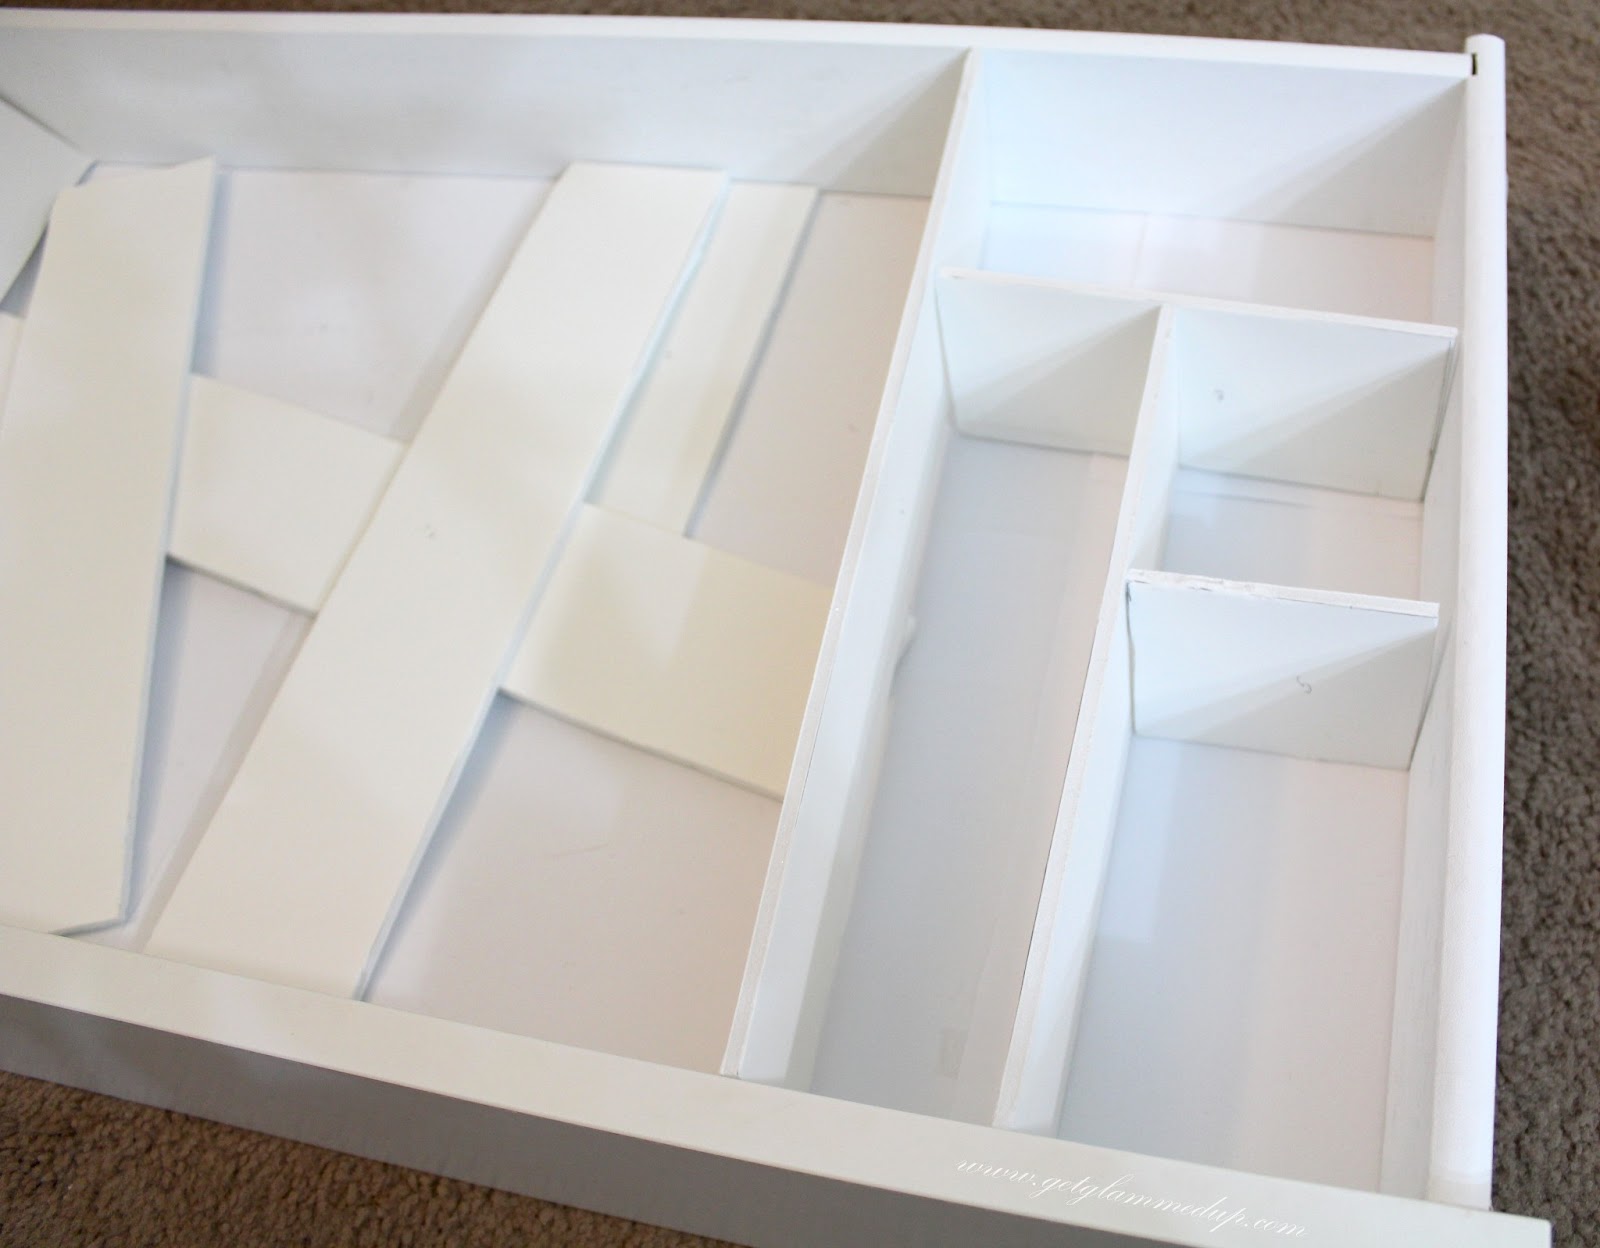
Place the dividers in your drawer to test them out and make sure everything is how you want it. If you look at the above picture, the pieces on the right do not overlap, they just fit up against each other. This is incorrect! I didn’t realize when cutting and measuring that I needed to make the pieces just a hair longer in order to criss-cross the pieces so they stand up. I had to find another way to attach them. The easier way- design your dividers so all pieces criss-cross instead of having so many different sized sections. It would have been a lot easier if I made the smallest piece you see on the right go all the way across instead of stopping.
Step 7:

Begin figuring out where you need all the notches and measure them accordingly.
Step 8:
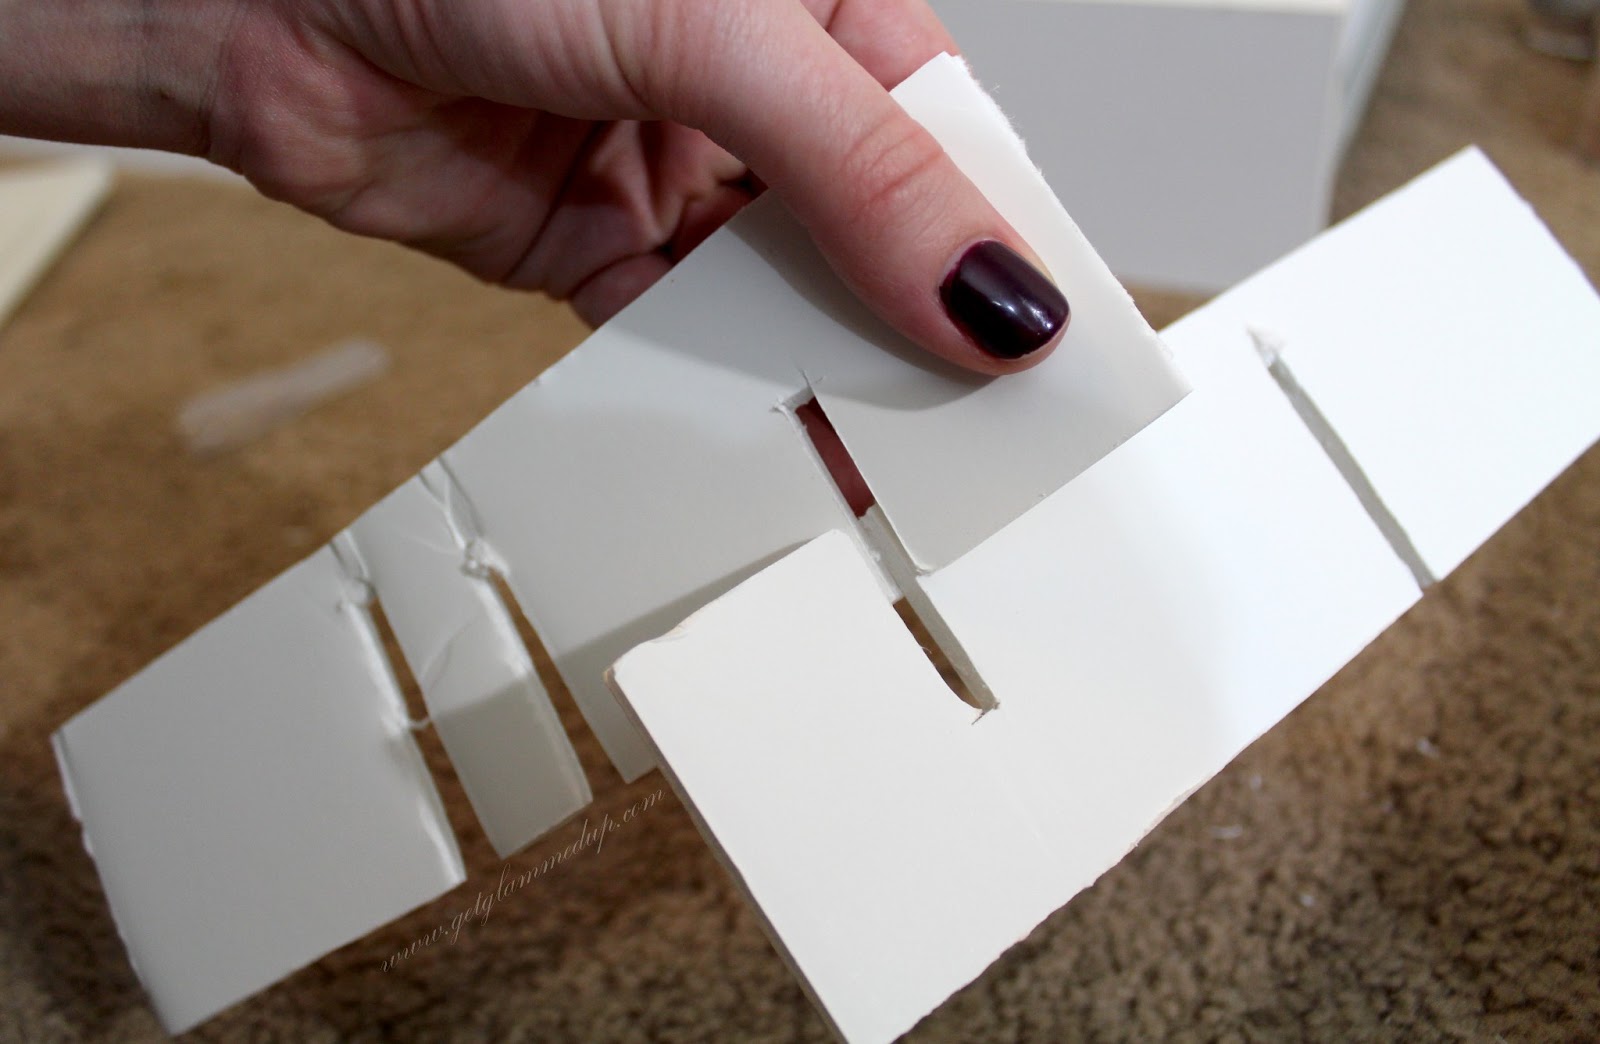
As shown above, I practiced on some scrap to see how I need to cut them. It is best to make them go half-way into the divider, and be slightly thinner than the thickness of the boards (so they fit snug together). You also want everything to lay at the same height, so the notches need to be go exactly to the center.
Step 9:
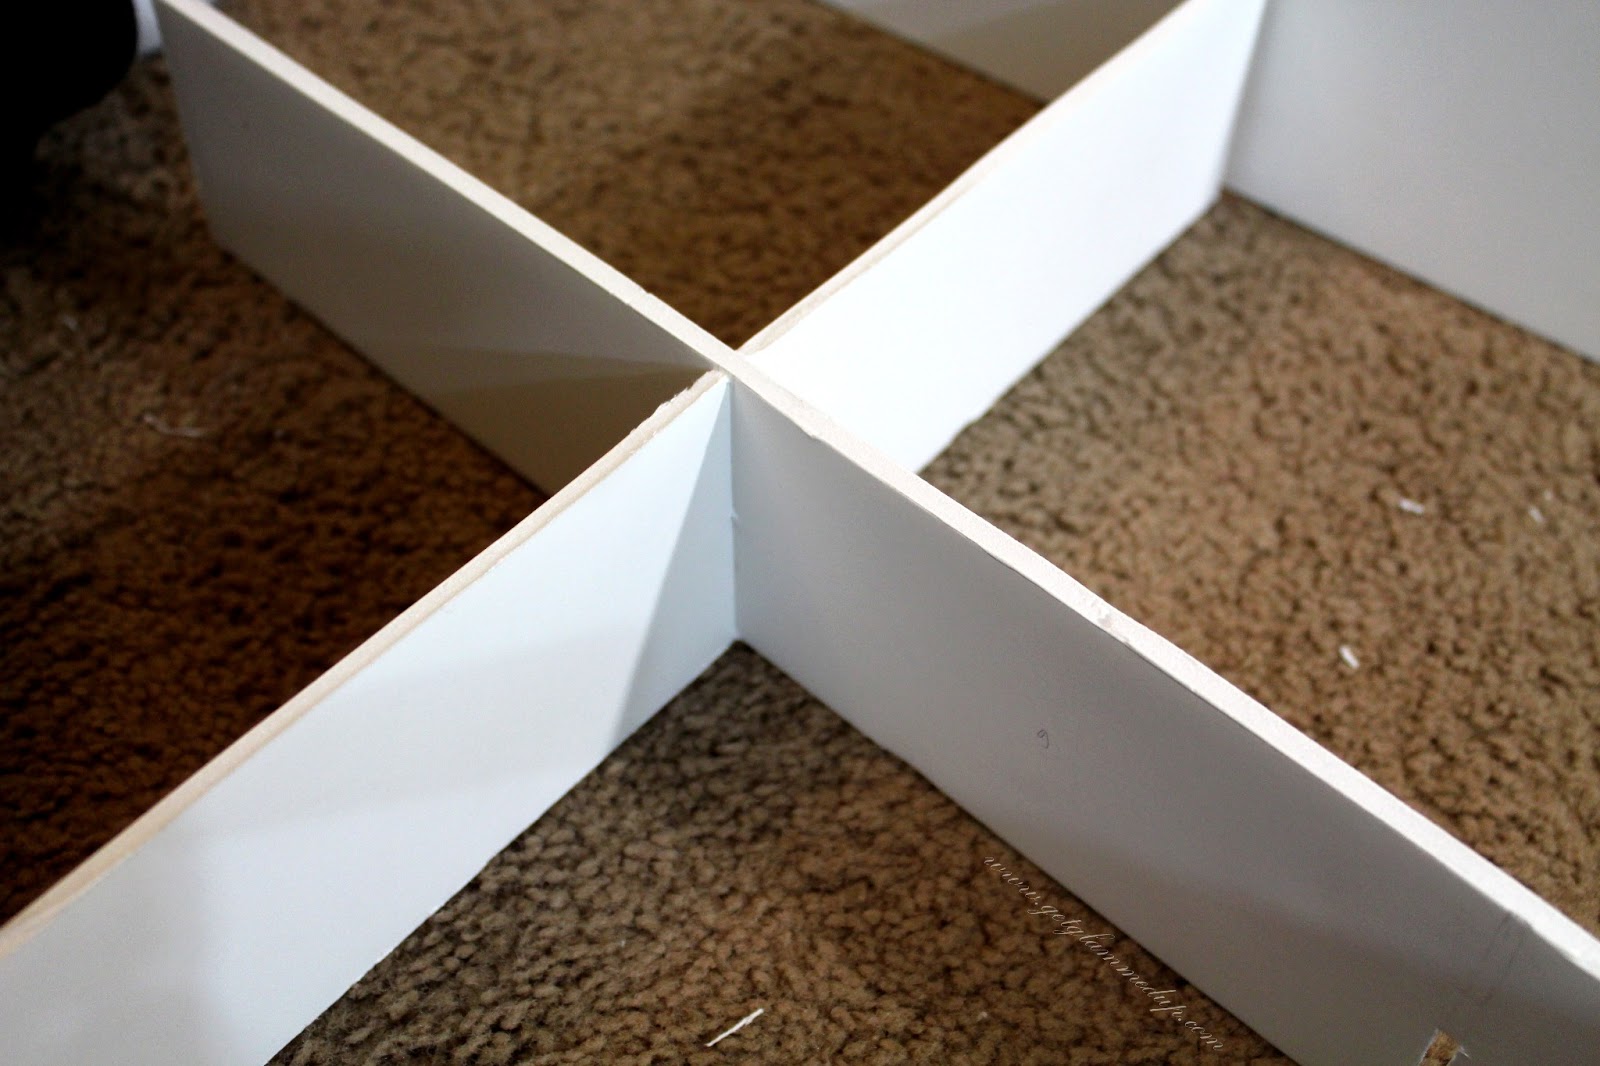
Cut out all the notches and begin assembling your dividers. I didn’t get a picture of it, but the pieces I mentioned before that I did not cut long enough pieces to be able to criss-cross, I ended up cutting a notch out of the very end and reinforcing it with super glue or double sided tape. (This can be seen in the picture below on the the far left small piece).
Step 10:
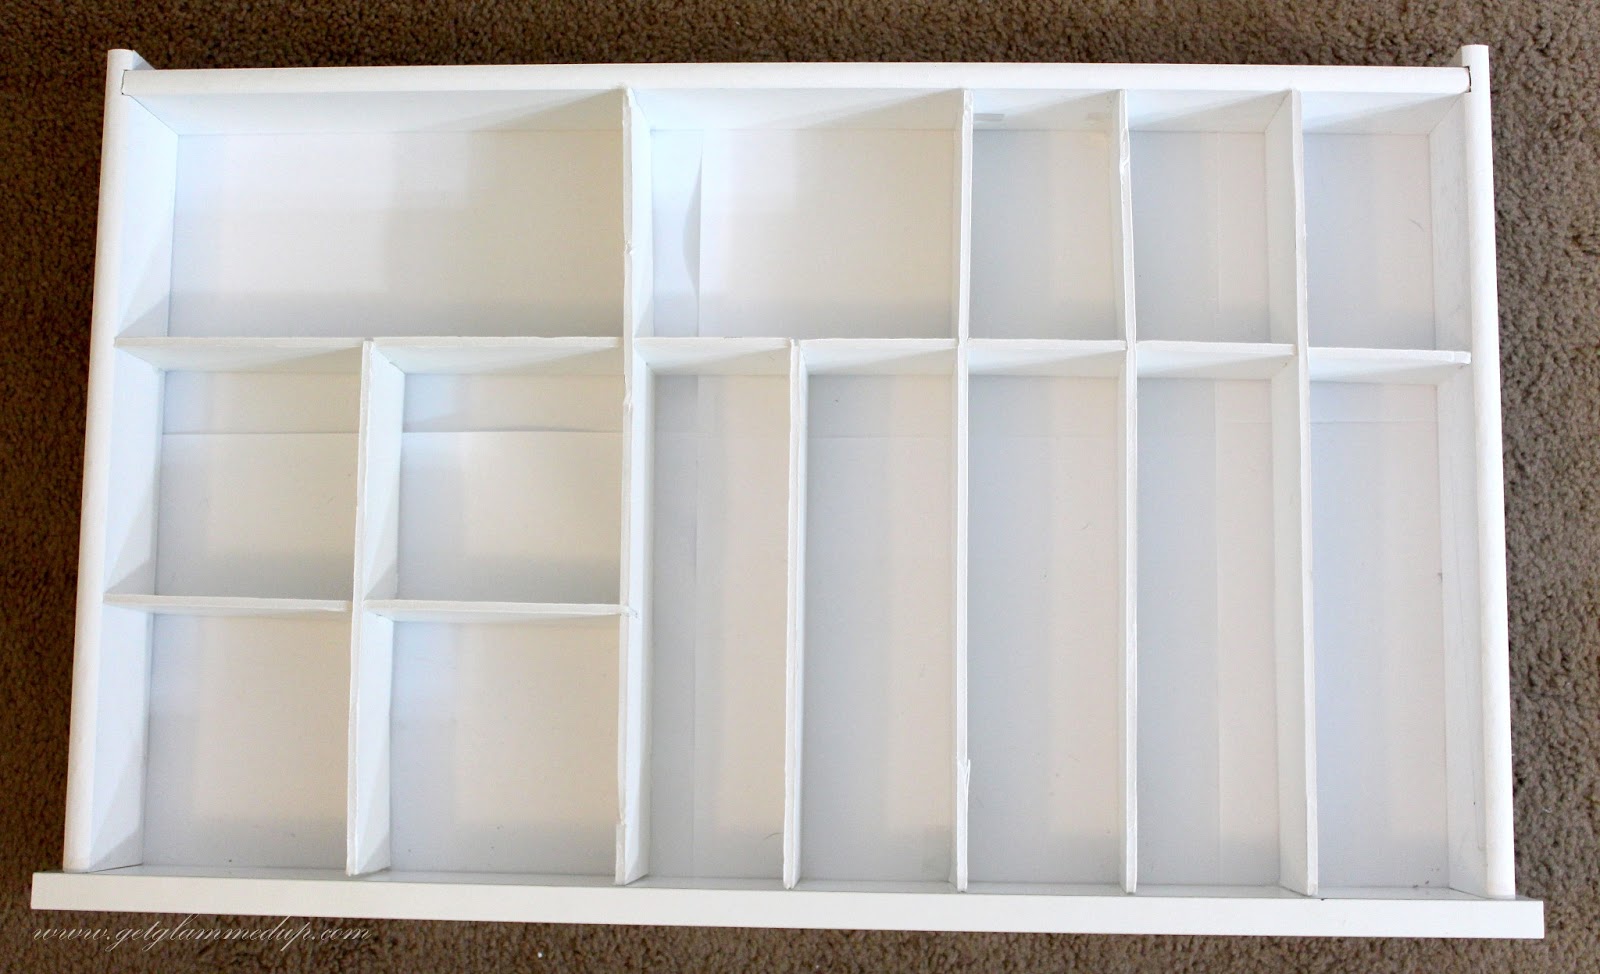
Place the structure into your drawer! Since mine fit in perfectly and wasn’t snug enough, some of the edges were a bit flimsy. So to fix it I used the double sided tape to tape the bottom of the pieces to the paper. I also used some tape on the edges to tape the dividers onto the sides of the drawer. This was only necessary for the pieces that didn’t have horizontal pieces across them to reinforce them (like the 5 long skinny sections in the above picture). Tape sounds cheap to use, but it worked really well and the feel sturdy!
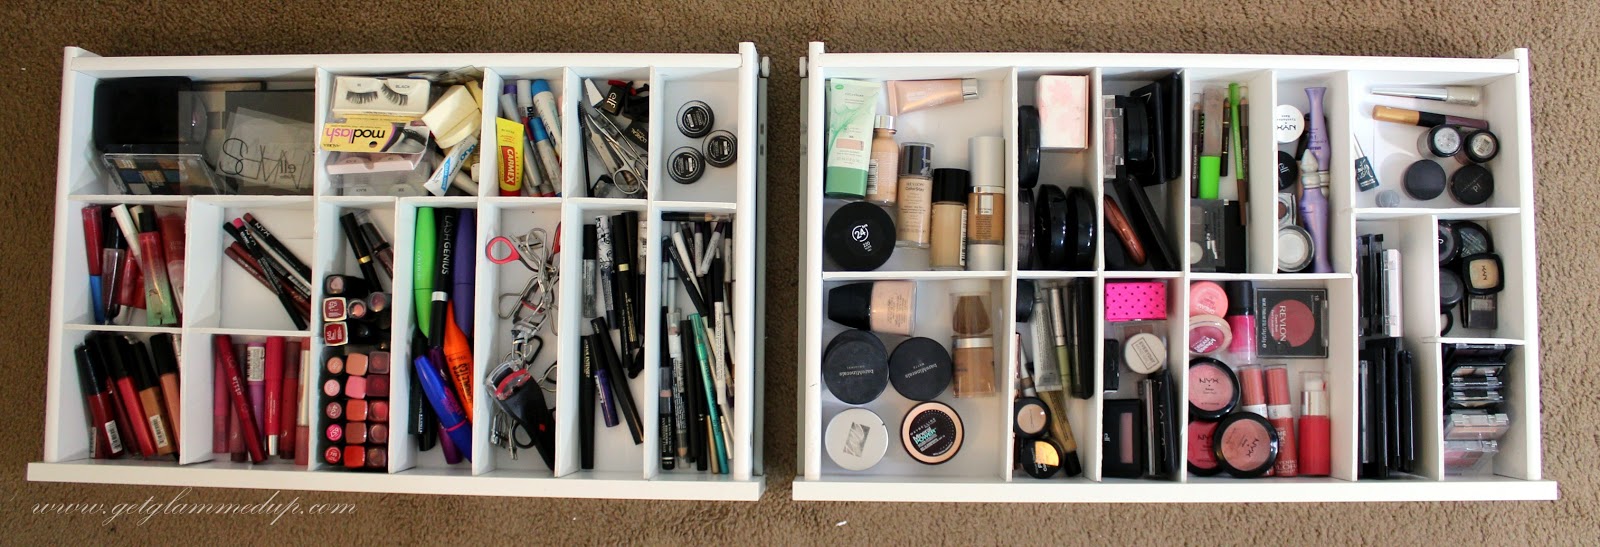
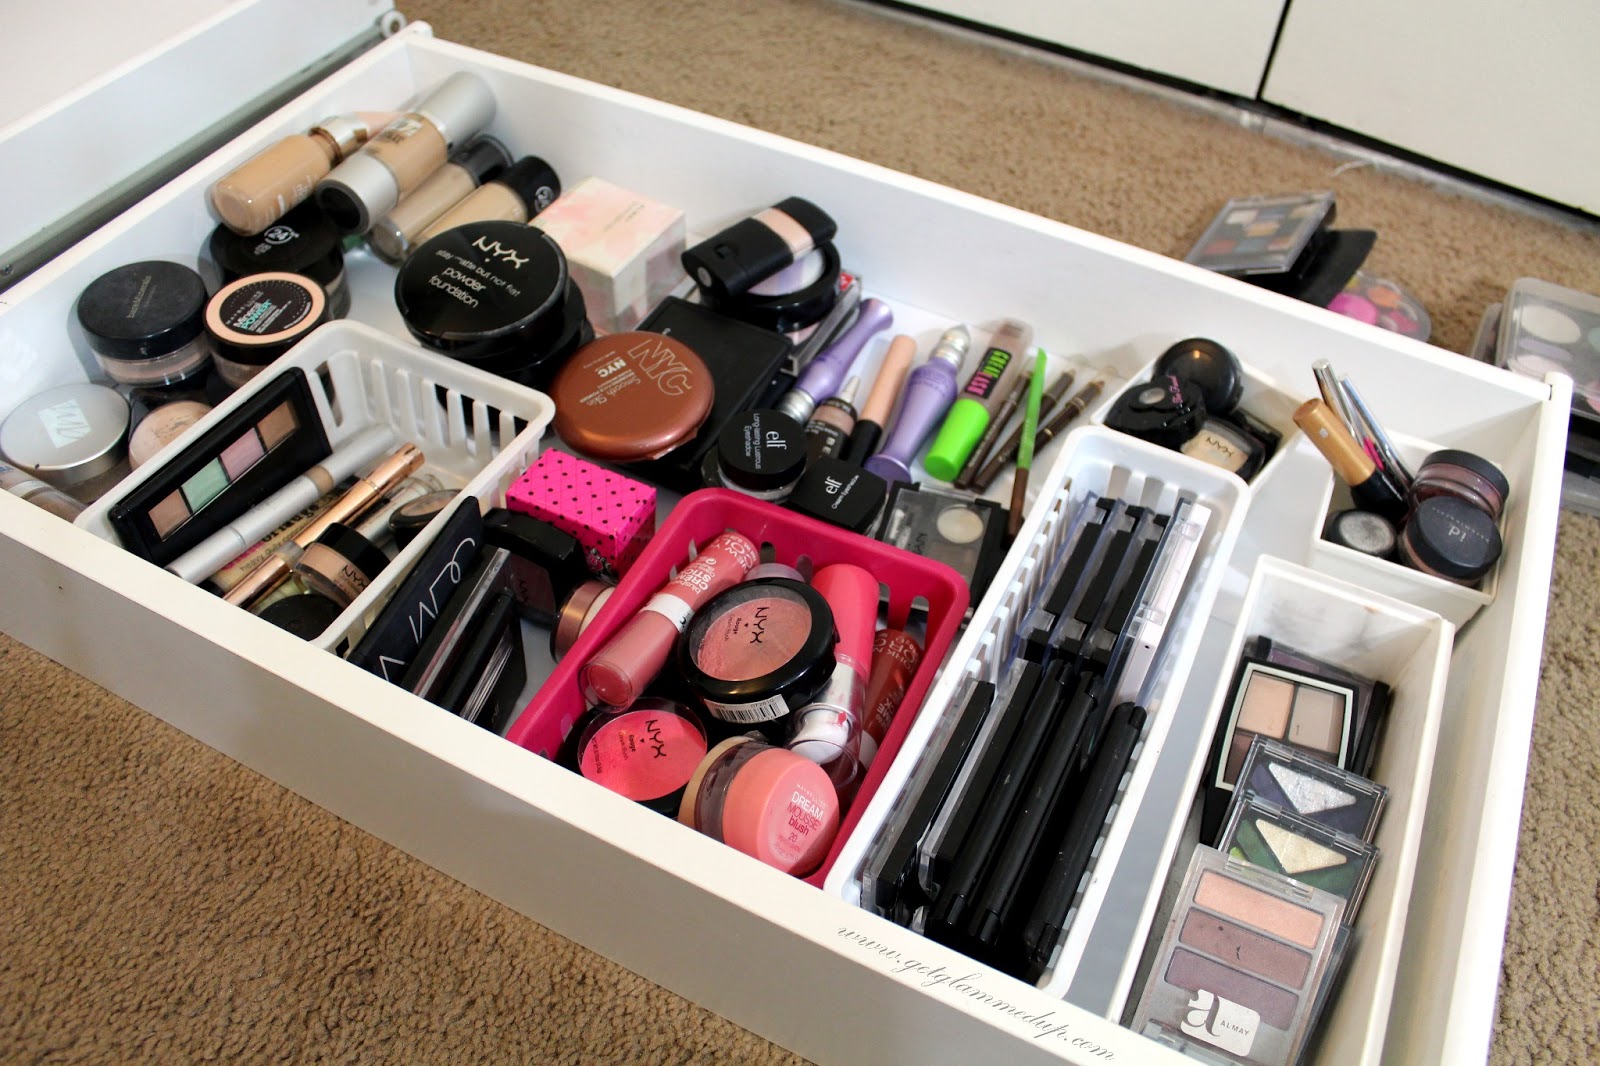
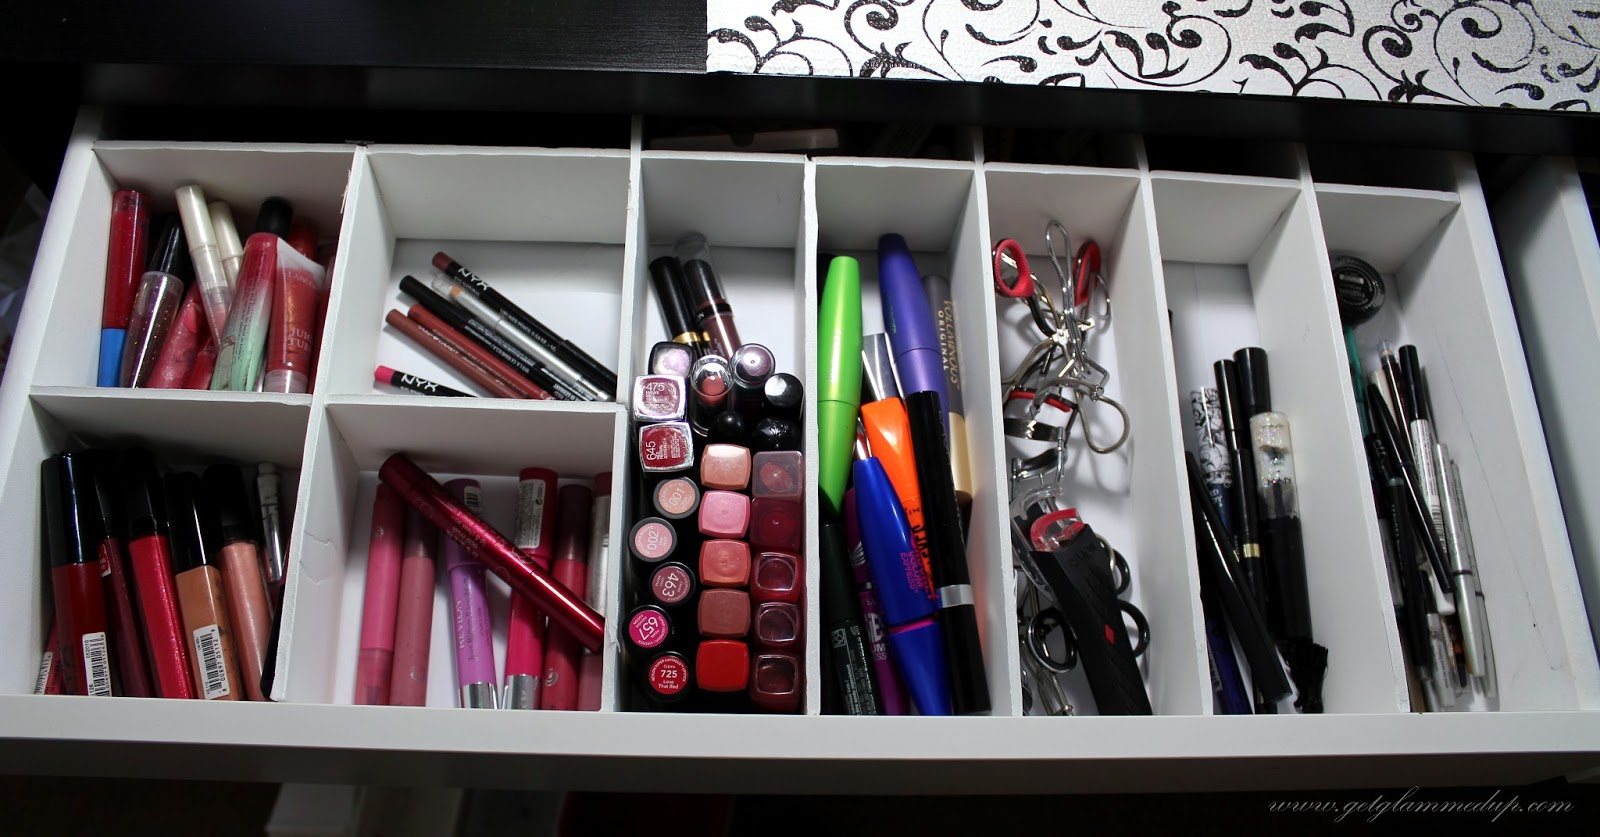
Here is the finished result! Notice I added a section that I had forgotten to the drawer on the right. By looking at the before and after, you can totally tell I was left with way more room to use! I also put my eyeliners and mascaras in the other drawer and cleaned out some of the unnecessary junk.
There was only one major problem I had…I should have measured how far my drawers pulled out. I knew they didn’t come all the way out, but I didn’t consider it enough with the back sections. Luckily the stuff I keep in the back I don’t access daily, but it is annoying. I have to lift up on the drawers to maneuver them out a little farther if I need to get something out of the back. And extra inch would have been enough for me to be able to still reach in.
So I hope you all found this helpful, and please, tweet me a picture @GlamMeUp if you decide to try this out. Comment below with your ideas or suggestions, or if you want to see an updated makeup collection!
Click here to see my last makeup collection
Check out my other home and organization posts!
♥ Check out my latest video ♥
♥ YOUTUBE: http://www.youtube.com/GlamMeUp8
♥ DESIGN WEBSITE: http://www.glammedupdesigns.com
♥ TWITTER: http://www.twitter.com/GlamMeUp
♥ EMAIL: gl*******@***il.com
♥ FACEBOOK: http://www.facebook.com/GlamMeUp8
♥ GOOGLE+: http://gplus.to/GlamMeUp
♥ INSTAGRAM: http://followgram.me/glammeup
♥ TINYCHAT: http://www.tinychat.com/GlamMeUp
♥ PINTEREST: http://www.pinterest.com/GlamMeUp
♥ My favorite makeup brushes: http://sigma-beauty.7eer.net/c/48954/146780/2835
♥ Discount designer clothing & makeup: http://bit.ly/o9niYB

If your waves or loose curls fall flat every summer — losing definition by midday, never lasting past wash day — this routine is built

Are you using a heat protectant in your curly hair routine? If you’re diffusing or planning to be in the sun, you probably should. But

You read the reviews online. One person says a product completely changed their hair. Someone else says it’s the worst thing they’ve ever tried. And

Amazon’s Prime Day Deals are happening today through Friday! I’ve rounded up my top curly hair picks on my Amazon storefront—plus shared quick notes below on each product’s key characteristics to help
3 Responses
This is so helpful! You are very creative!
Gina you're a life saver, I'm going to do this when I get a new desk
LOVE IT!!!!!!