


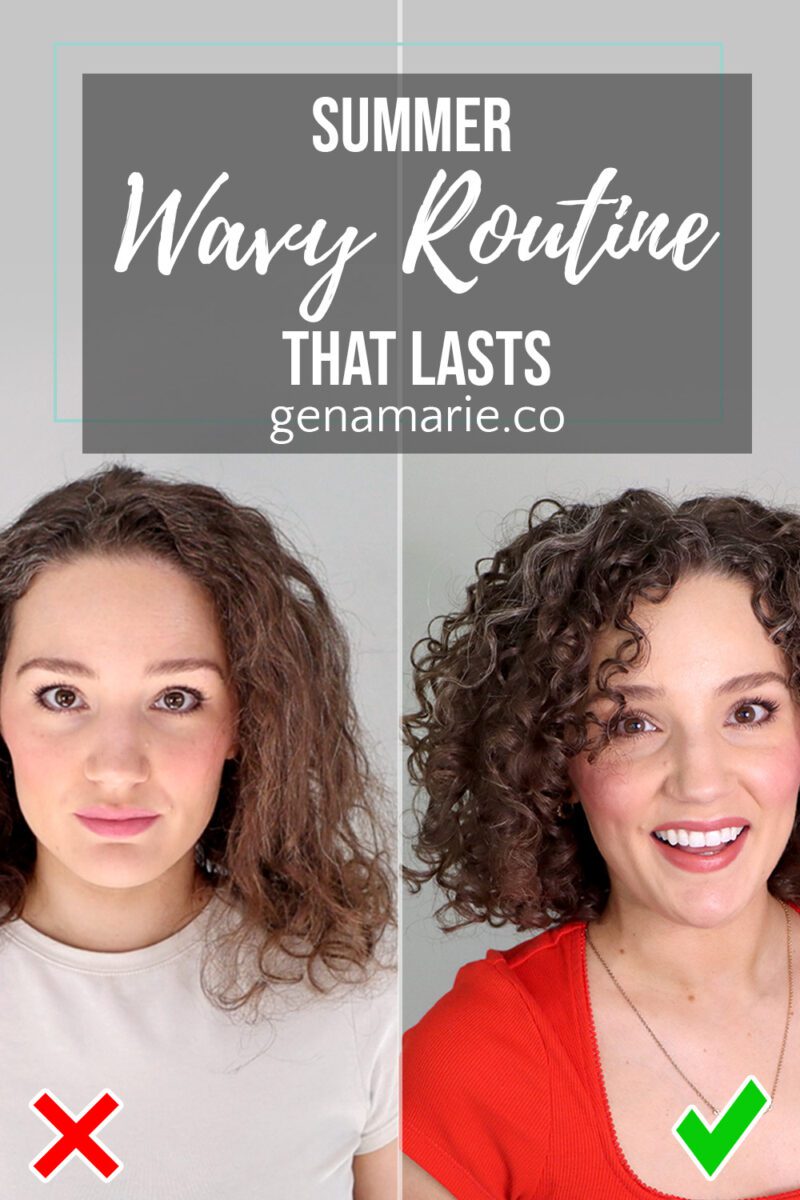
Wavy + Loose Curl Summer Routine That Actually Lasts
If your waves or loose curls fall flat every summer — losing definition by midday, never lasting past wash day — this routine is built
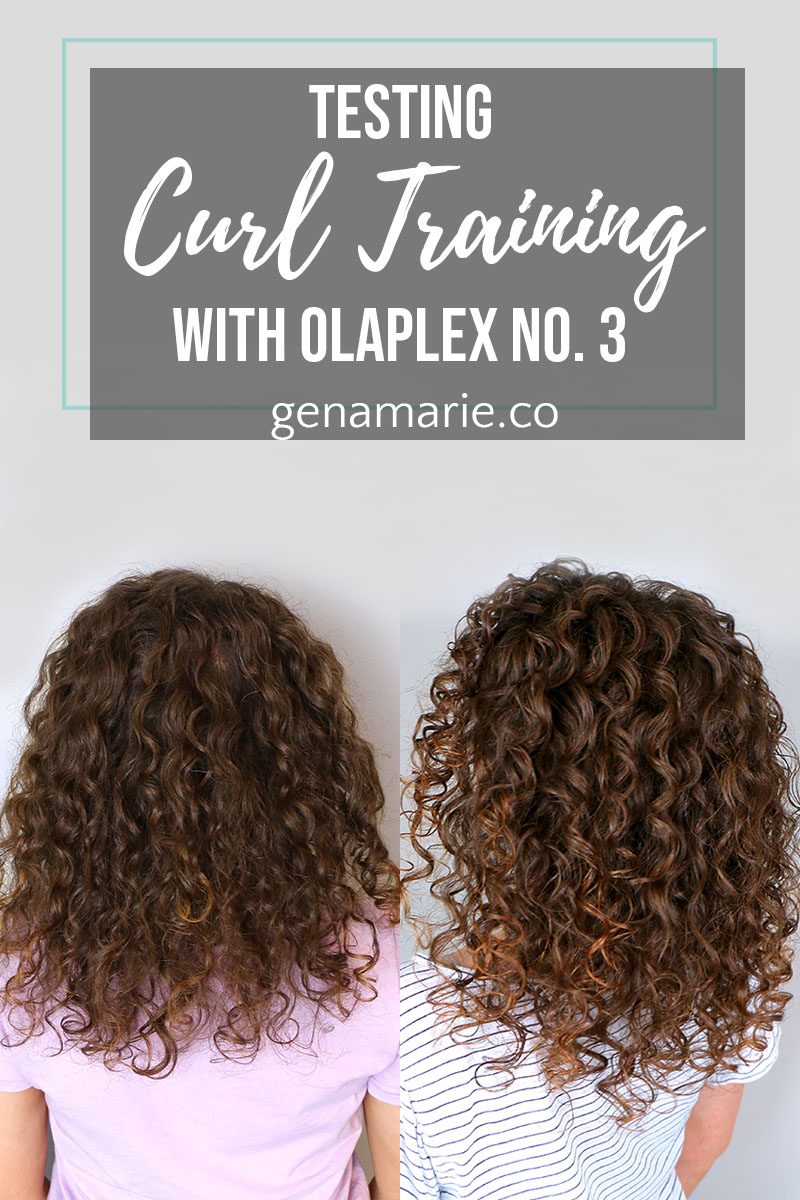
For today’s testing video, I’m comparing the results of the curl training method while using Olaplex No 3., compared to using Olaplex No. 3 by itself.
Special thanks to LookFantasic.com for sponsoring this post, and for providing y’all with 20% off code GENA that you can use on Olaplex and other items on their site!
Olaplex uses patented bond-building technology, which relinks the broken disulfide bonds caused by chemical, thermal, and mechanical damage to the hair. Basically, it’ll be your best friend if you have any sort of damage in your hair.
The original Olaplex is actually a treatment that is done in the salon when you are getting your hair lightened, colored, or to restore severe damage. They developed the No 3. treatment as the take-home product, to help you maintain your hair’s health. However, you do NOT have to get the other salon treatments done to be able to use No 3. You can also use this on virgin hair that has never been chemically damaged because our hair still can have environmental damage such as from the sun.
Olaplex is especially loved in the curly community because it repairs damage and enhances your natural curl pattern. I’ve noticed my curls became tighter with using Olaplex regularly.
For the first wash routine, I first used a clarifying shampoo, then used Olaplex No. 3 like normal. After I let it sit for about 30 minutes, I shampooed with a gentle cleanser and deep conditioned. My final results were great, as always with Olaplex. My curls bounced back, were super defined, and it felt healthy and strong.
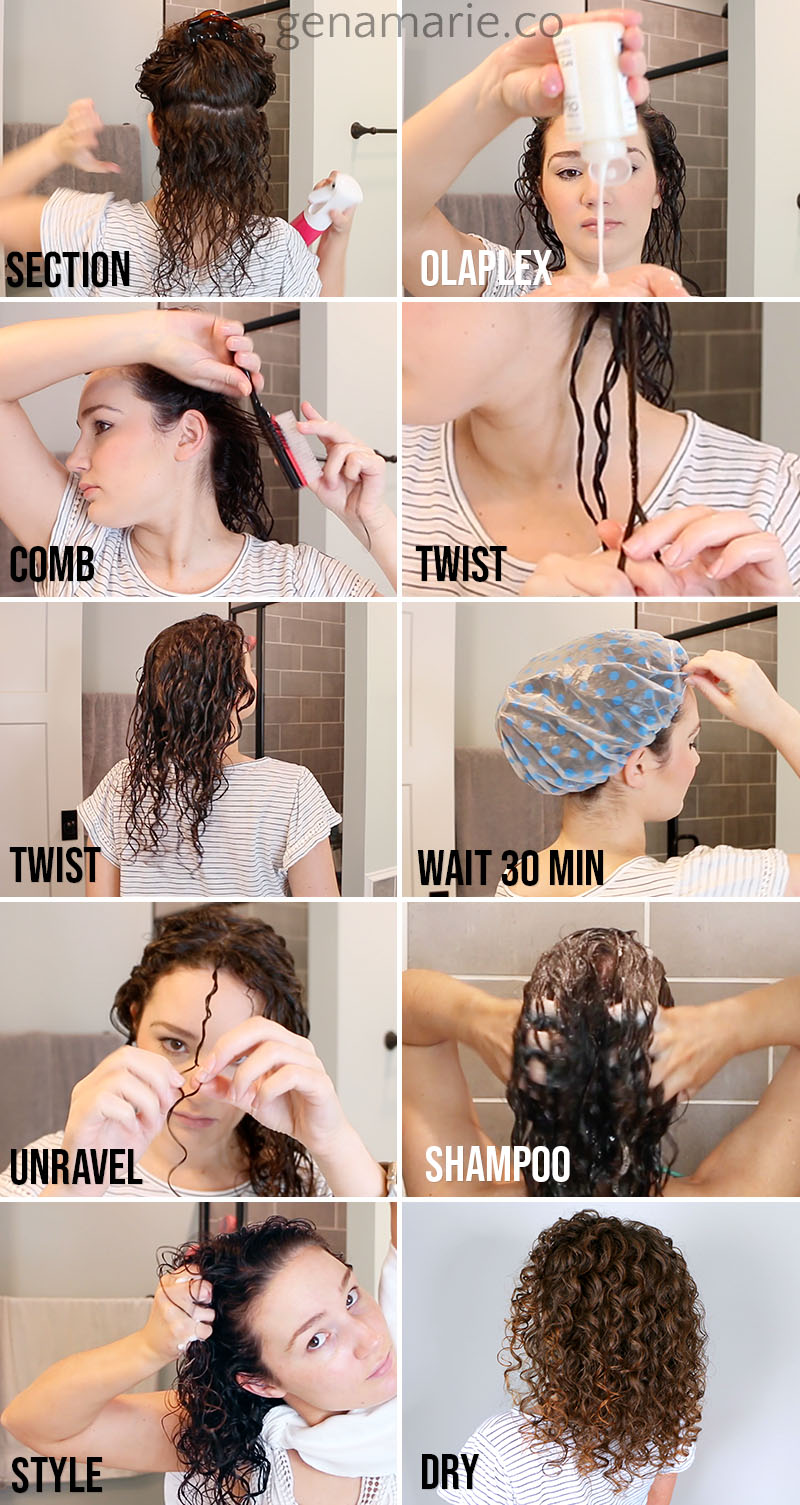
For the second wash day, I incorporating the curl training method while I had the Olaplex No 3. in my hair. Here’s how to train your curls:
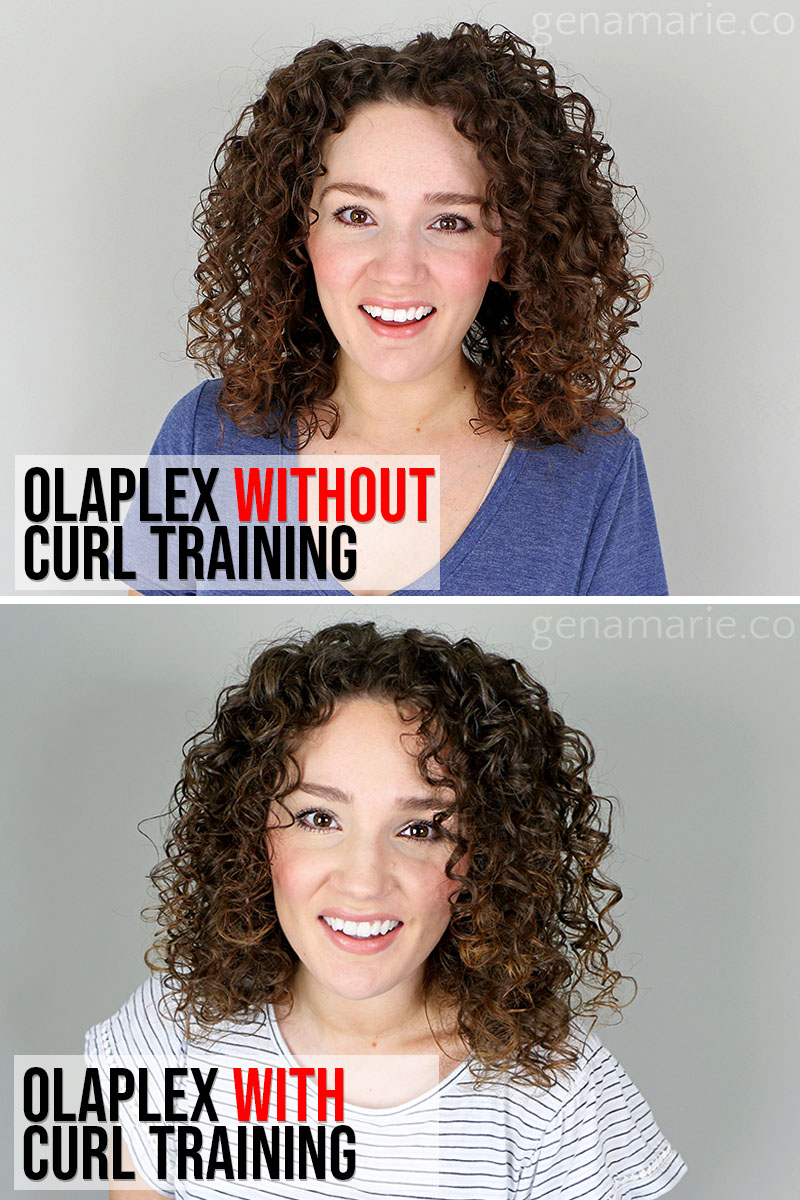
Curl training made my curls SO much tighter to where I had a ton of shrinkage. I love shrinkage but some may find this to be a downfall. Also, I had so many curl clumps. Curl clumps are great but with low density hair, they can reduce the fullness and volume in the hair. I could have done more to separate them to get volume as I was styling, but I wanted keep my routine the same as the first one for an accurate comparison. Also, it is a pretty time consuming process to do curl training, plus take all the twists out. However if you are in the transitioning process and really trying to get your ringlets back, this could help!
Overall, I still had great results from the Olaplex No. 3 when I didn’t do the curl training technique. Both methods are going to improve your curl definition the more you do them and stay consistent.
If you want to grab Olaplex No. 3, don’t forget to use the discount code GENA for 20% off. Expires 9/30/20. It’s rare to see a coupon for Olaplex so take advantage of it! ?

If your waves or loose curls fall flat every summer — losing definition by midday, never lasting past wash day — this routine is built
Are you using a heat protectant in your curly hair routine? If you’re diffusing or planning to be in the sun, you probably should. But

You read the reviews online. One person says a product completely changed their hair. Someone else says it’s the worst thing they’ve ever tried. And
Amazon’s Prime Day Deals are happening today through Friday! I’ve rounded up my top curly hair picks on my Amazon storefront—plus shared quick notes below on each product’s key characteristics to help
3 Responses
Oh wow! I love the curls on the model and it is so obvious from the photos that you definitely need a bit of training to use Olaplex. But it looks like a tedious amount of work. How long do these curls last? Please don’t tell me they will disappear with the next wash.
Hi Arun,
It is time consuming to do curl training, which is why I mentioned in the video that it’s best for people who have damaged hair and are really trying to improve their curl pattern as their hair recovers. It’s not something that I do every wash day. IF your hair is naturally curly, it’s not going to disappear with washing. It basically helps your curls become tighter over time as you continue doing it.
Hey Gena,
Love your videos! They’ve been invaluable for me, as I’m transitioning back to my natural hair after almost 20 years of straightening.
Do you think this would also work if I did the twists *after* washing out the Olaplex + shampooing? I’ve used up over half a bottle of Olaplex and haven’t seen any improvements at all, even though my hair’s heat damaged. So I was thinking of trying this technique a different way.
The hair near my nape used to always curl up the most, i.e., I used to straighten that part the most – now, those hairs don’t even curl. 🙁 The rest of my hair is bouncing back, but the sections near my nape are still almost totally straight and aren’t improving, no matter how much I finger coil/Denman brush those parts, even though it’s been over a year of transitioning. So I was thinking of trying this curl training method while I’m styling – after applying a light leave in, I’d put the problem nape sections into twists, style the rest of my hair as usual, apply gel (also to the twists), then diffuse. Once dry, I’d unravel the twists.
Do you think that would work, too, to train the curls? Or is there a specific reason that it needs to be done only with Olaplex and before shampooing + styling?
Thanks a bunch!