


How to Style Curly Hair for Volume Using the Curl Stacking Method
Your styling technique could be the reason your curls are drying flat, stretched out, and stuck to your head — not your products, not your
This post is sponsored by Curlsmith. All opinions are my own. Affiliate links are used.
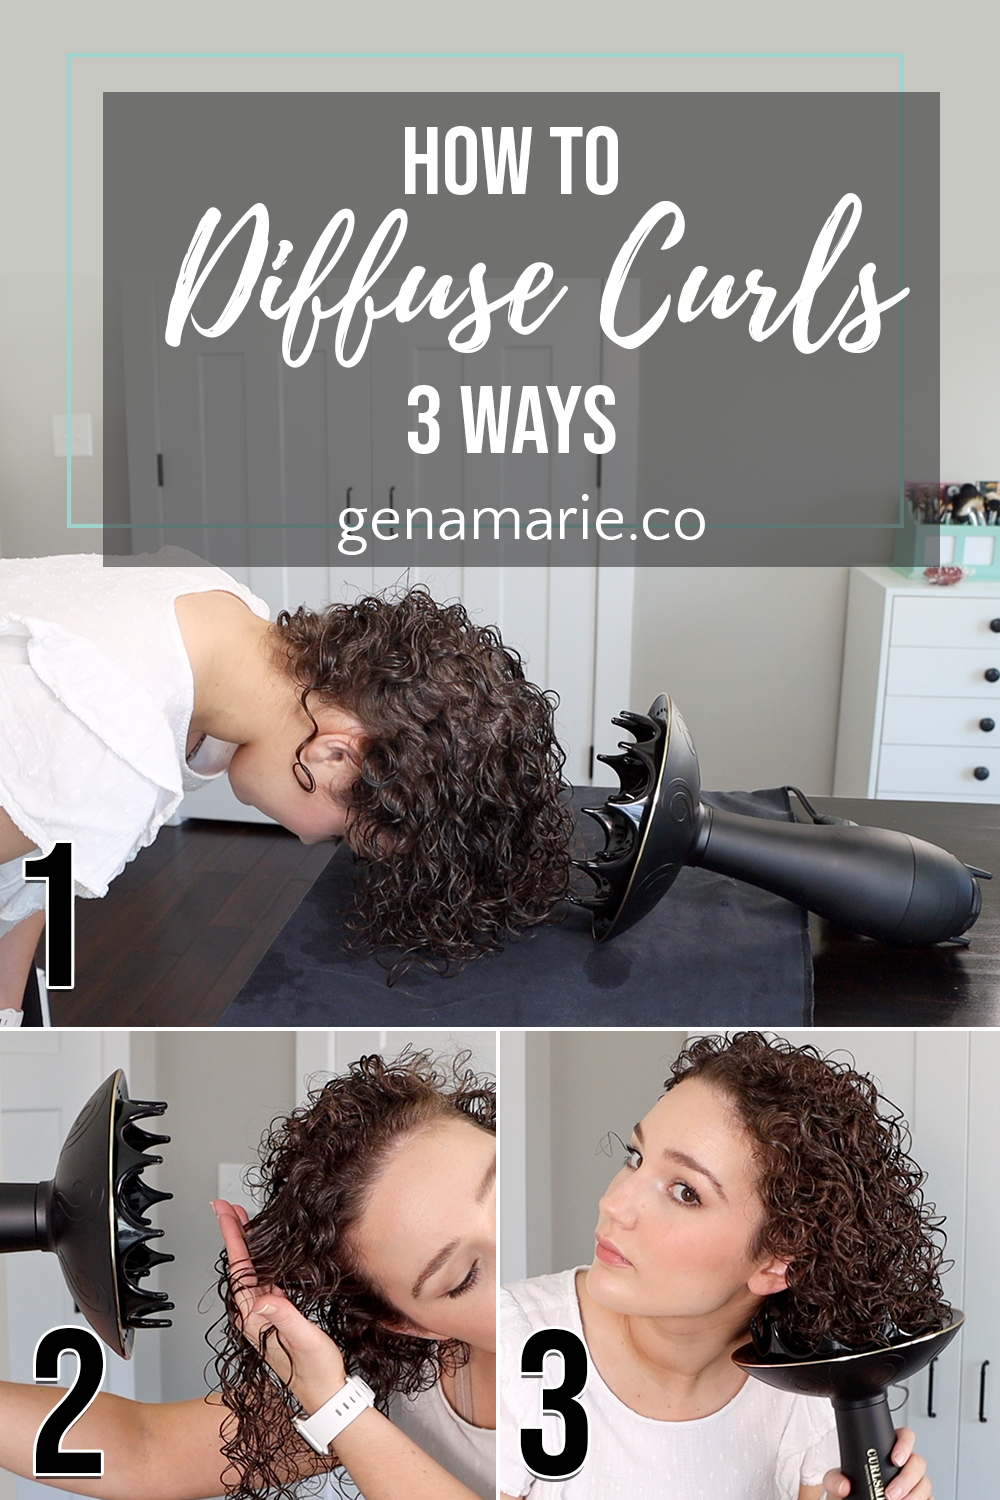
Just when I thought my recent diffuser couldn’t get any better, Curlsmith released the De-Frizzion Dryer. Its massive 8-inch diffuser is the largest diffuser on the market and it’s designed to meet all our curly needs. I put it to the test and timed how long it took to fully dry my hair. I’m also sharing how to diffuse curly hair using three techniques: plop/hover diffusing, stretch diffusing, and scrunch or “pixie” diffusing.
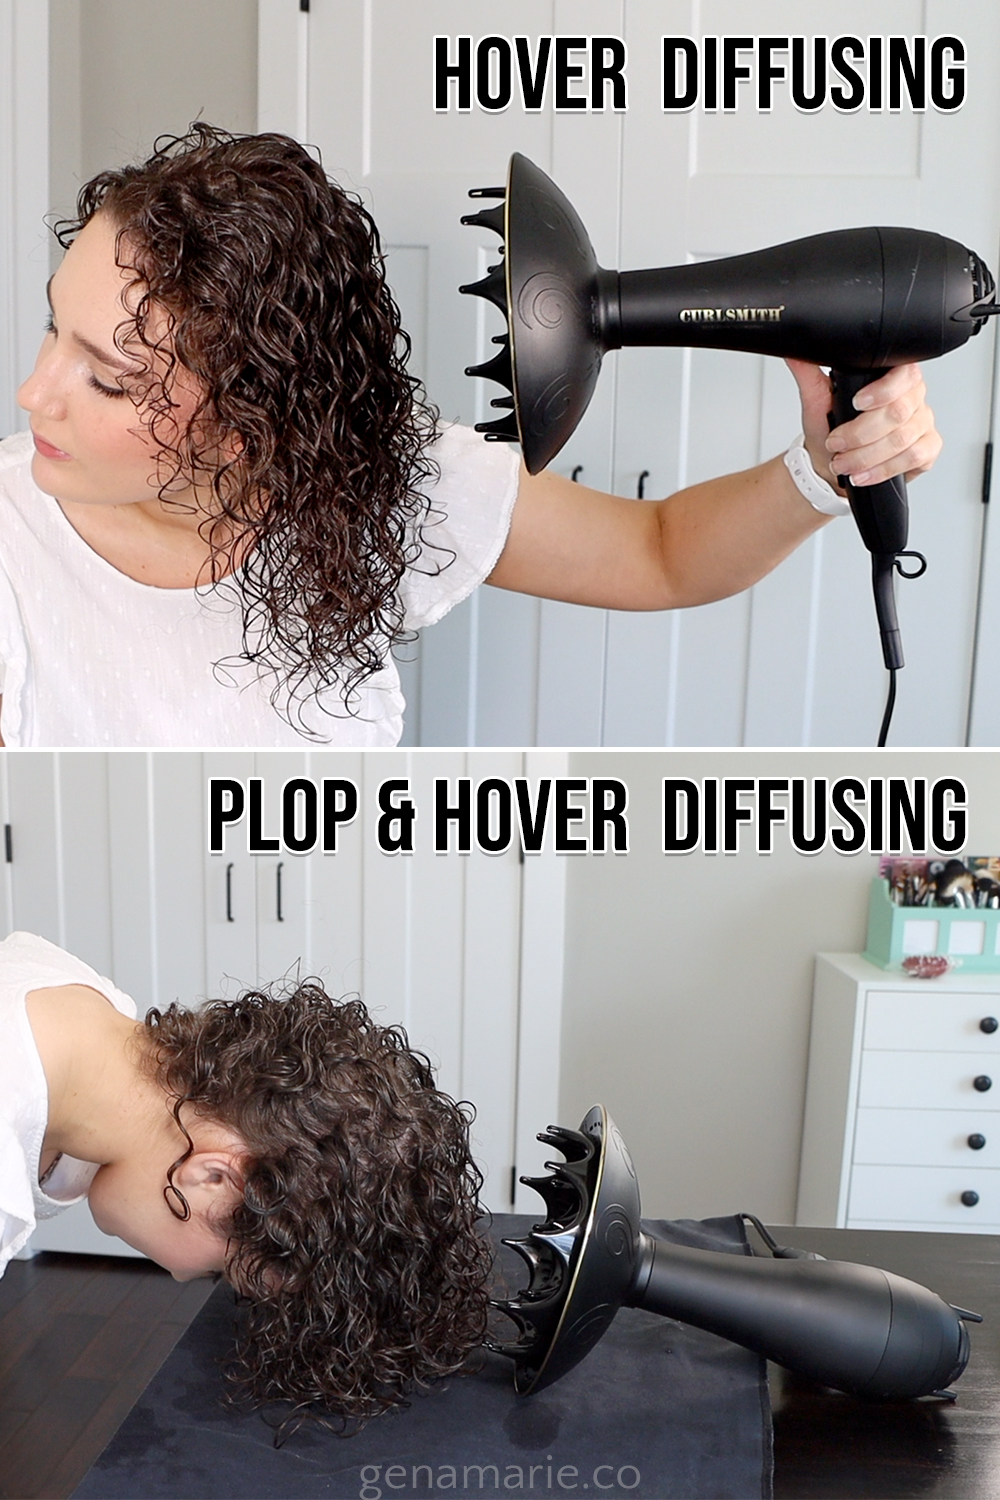
The hover diffusing technique involves simply hovering your diffuser slowly around your head at a distance. The goal is to avoid disturbing the curls by touching them with the diffuser while the gel cast gets, preventing frizz. Those whole struggle with major frizz, have damage or want maximum definition can use hover diffusing.
I usually start my diffusing routine with the plop & hover method because it’s a great way to prevent the curls from becoming elongated from hovering alone. The curls are plopped over a surface like a counter so they remain pressed up towards the scalp. This scrunched position will help the curls remain tighter and encourage shrinkage. You can either set your diffuser down on your surface as I show in the photos, or you can hover it around your head. I do some of both. I love that the Curlsmith dryer has a kickstand on the back of it so you can prop it up if you aren’t able to hold it.
Once the gel cast begins to form, I move on to scrunch diffusing.
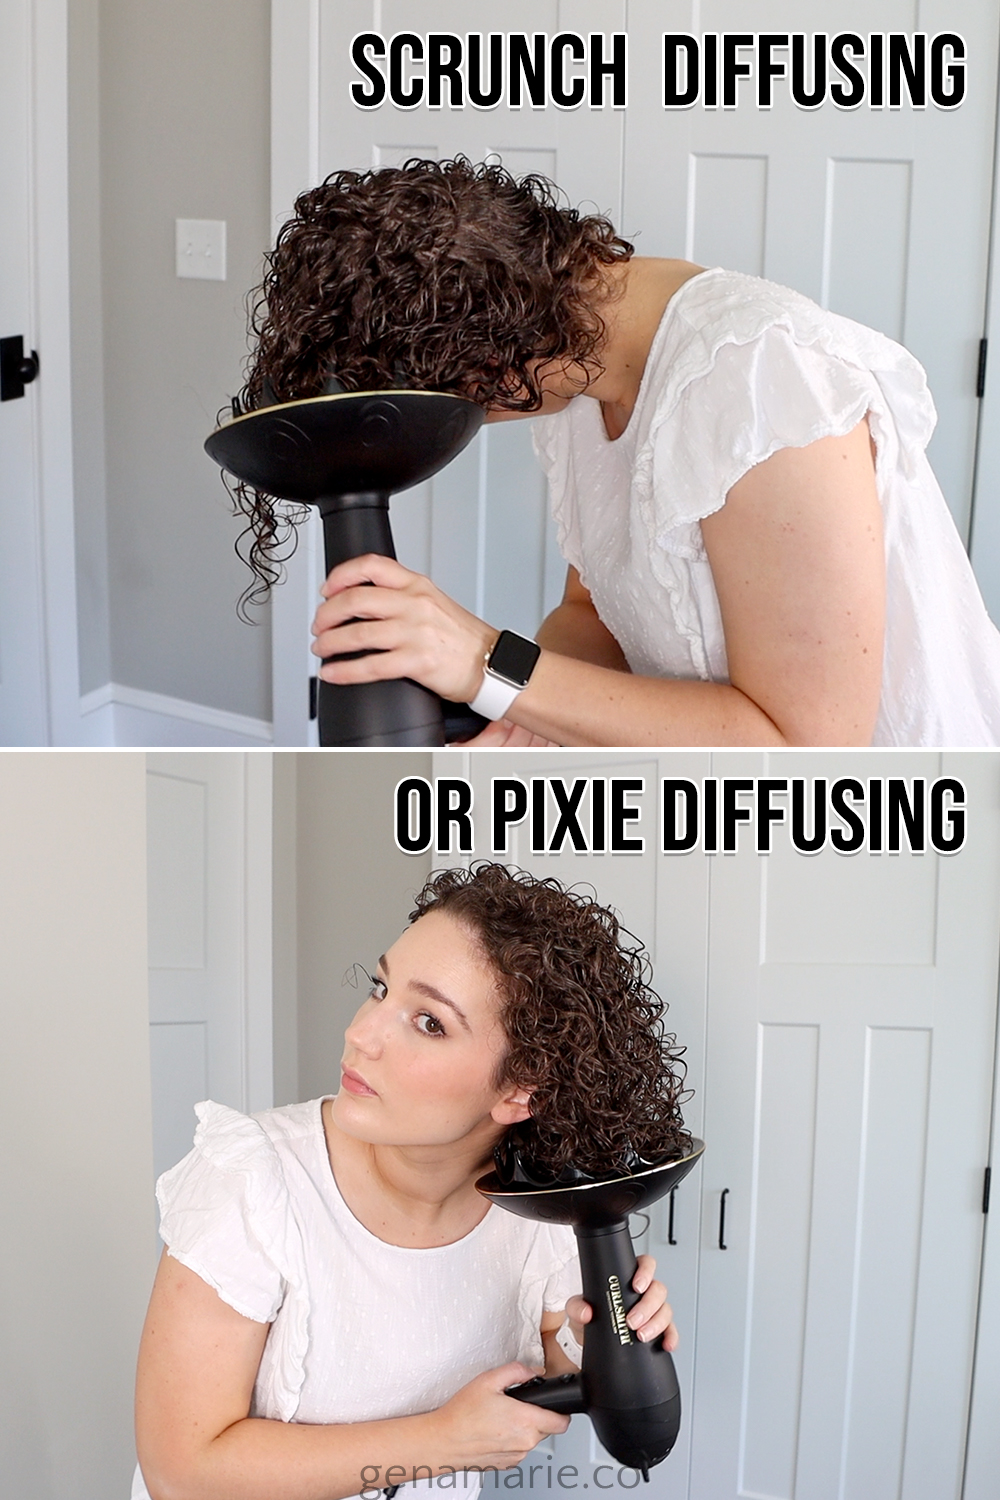
Scrunch diffusing is your most common diffusing technique that can be done upside-down for more volume and/or right-side-up for more shrinkage. This method is ideal for those who want to encourage shrinkage and tighten their curl pattern or achieve more volume. Gather the ends of the hair into the diffuser bowl and press up towards the scalp.
To prevent wonky, misshaped curls, you can try the pixie diffusing technique. This follows the same technique as scrunch diffusing, however, you turn the hairdryer off and back on as you move between sections. This prevents the curls from blowing around as you move to different sections because you can properly plop the curls into the diffuser. This can also prevent frizz and flyaways that may occur from the air blowing. However, this Curlsmith dryer has an adjustable speed setting so if you’re using the low speed it shouldn’t be blowing your hair hard all over the place.
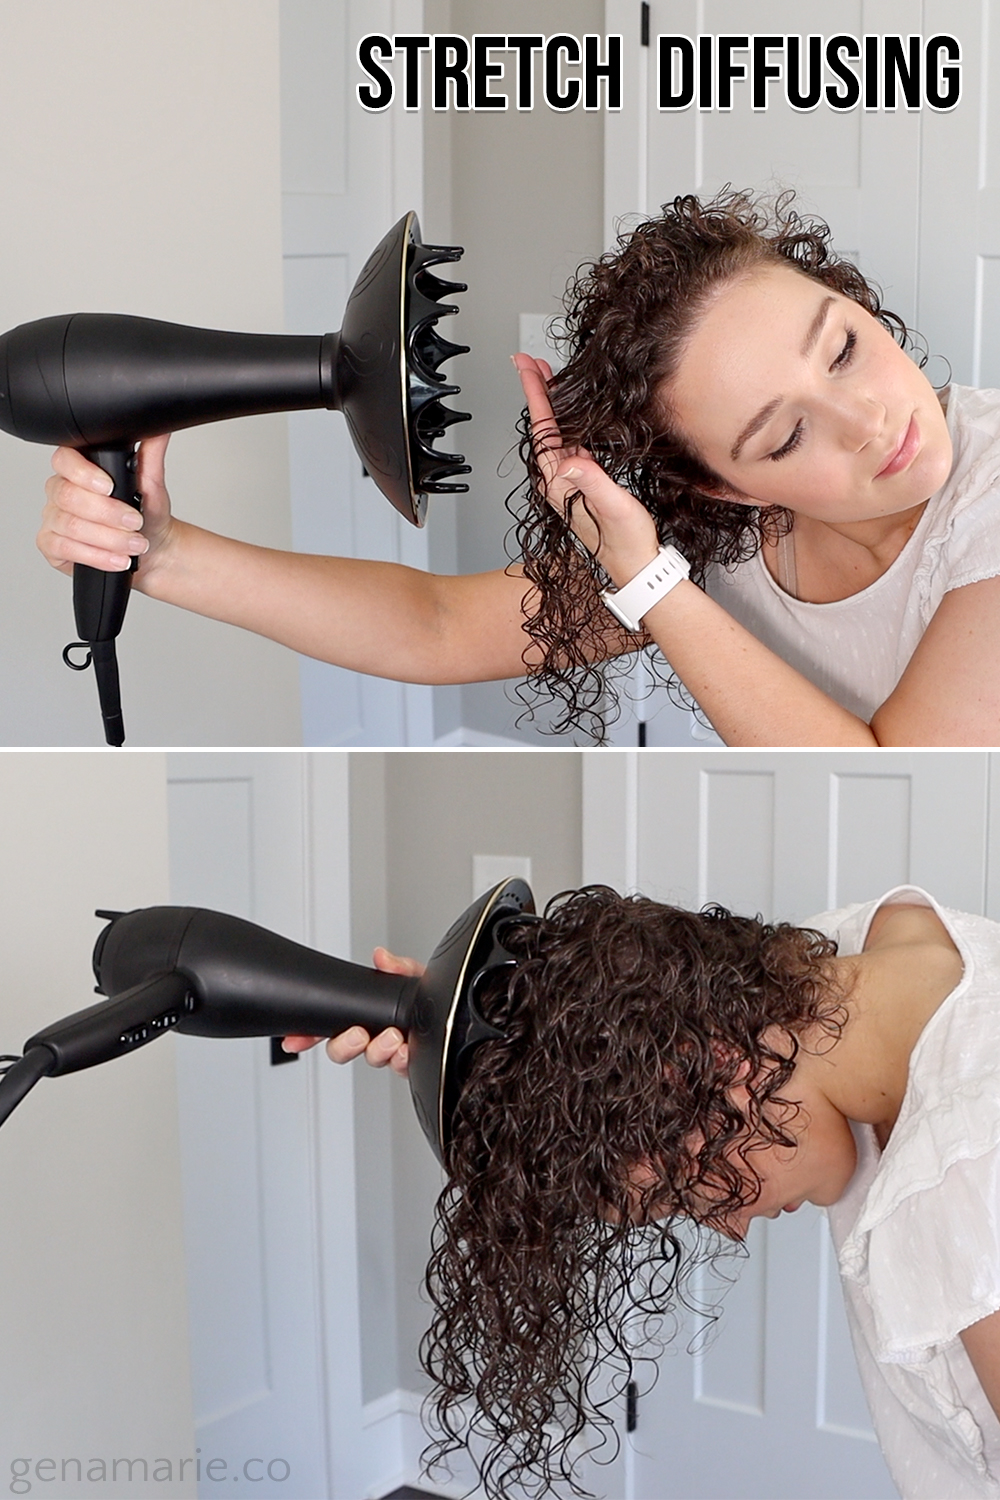
The stretch diffusing technique is most popular among tight curl patterns and coily hair types because it prevents shrinkage. If your curls are naturally very tight you likely experience a lot of shrinkage when you diffuse. If you are looking to maintain length and reduce shrinkage, you can gently stretch your roots or the lengths of your curls while you hover the diffuser. You can also go into the hair with the diffuser prong and use the prongs to gently pull the hair down and hold it.
One of my favorite things to do with a diffuser is use the prongs to lift the roots up and hold it. This instantly creates more volume at the root because the heat helps to set the hair into place, helping the hair remain in the lifted position. If you want volume you want to keep the hair lifted off of the scalp. This can also be achieved by diffusing upside down, however I notice the biggest improvement in lift when I use the prongs to lift my roots while I’m upright. I usually do this towards the end of my routine when my hair is still damp at the root but not totally dry yet. You can’t alter the hair when it’s already dried so it needs to be somewhat damp still.
The Curlsmith dryer has prongs that are long enough to reach the roots, and the prongs have holes in them that allow the airflow to reach the scalp, reducing dry time.
Overall it took right under 14 minutes to diffuse my hair from start to finish. I’m impressed with how fast my hair dried when the Curlsmith dryer doesn’t get that hot compared to other hair dryers I’ve tried. There are several factors that contributed to this fast dry time:
I had the honor of testing out this hair dryer and diffuser for several weeks, and I instantly fell in love with it. The biggest advantage, for me, is that it does not get as hot as other hair dryers I’ve tried and still manages to dry my hair quickly due to the diffuser design. Although I love the design of my other diffusers, this one just checks all my boxes plus uses lower heat. I have not noticed any heat damage from my other diffusers, however I know many people have said they don’t like dryers that get too hot.
I plan to continue to test more hair dryers and diffusers for you all so that I can offer multiple options depending on your budget, preferences, availability in your country, etc.

Your styling technique could be the reason your curls are drying flat, stretched out, and stuck to your head — not your products, not your
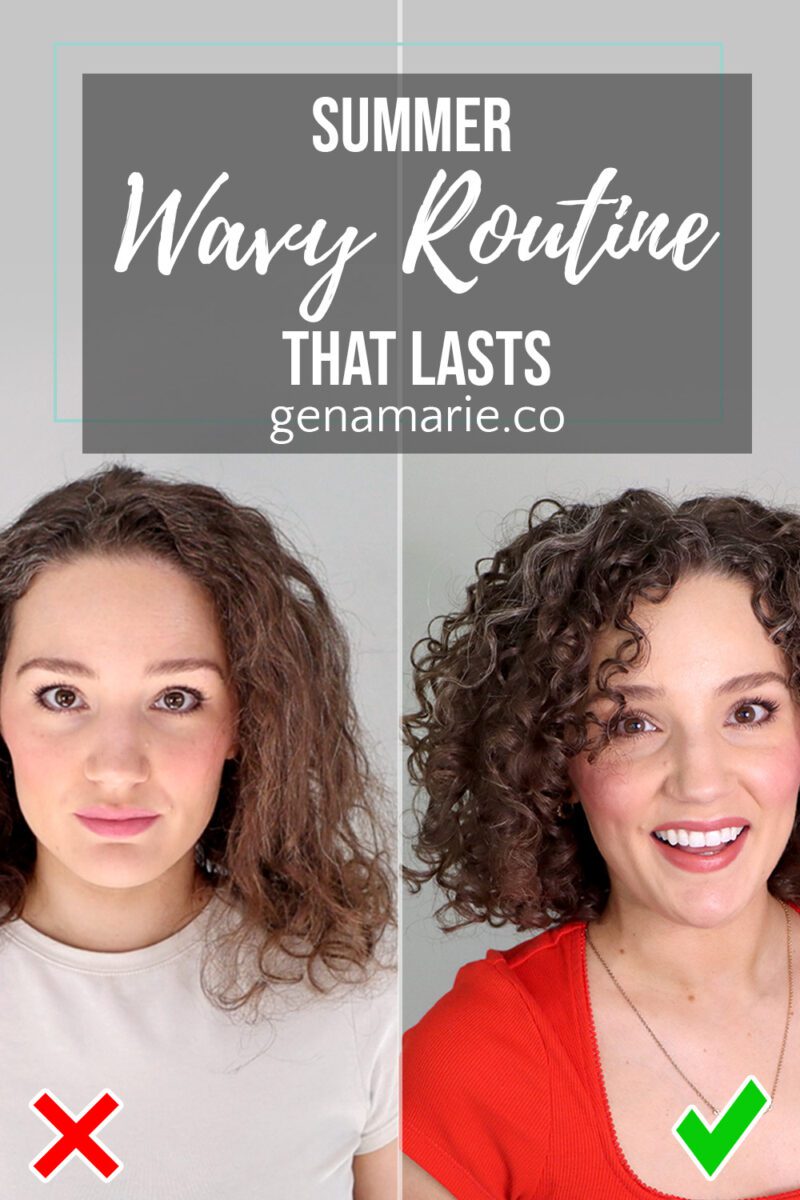
If your waves or loose curls fall flat every summer — losing definition by midday, never lasting past wash day — this routine is built
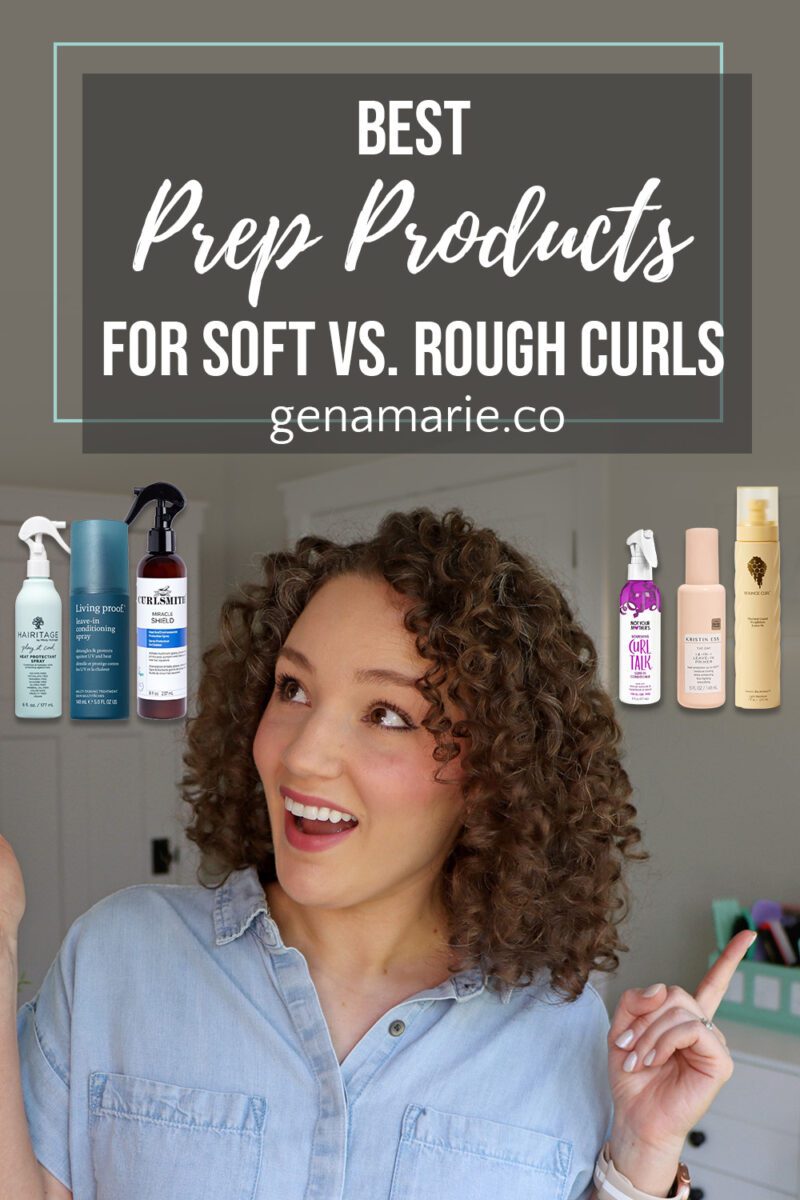
Are you using a heat protectant in your curly hair routine? If you’re diffusing or planning to be in the sun, you probably should. But
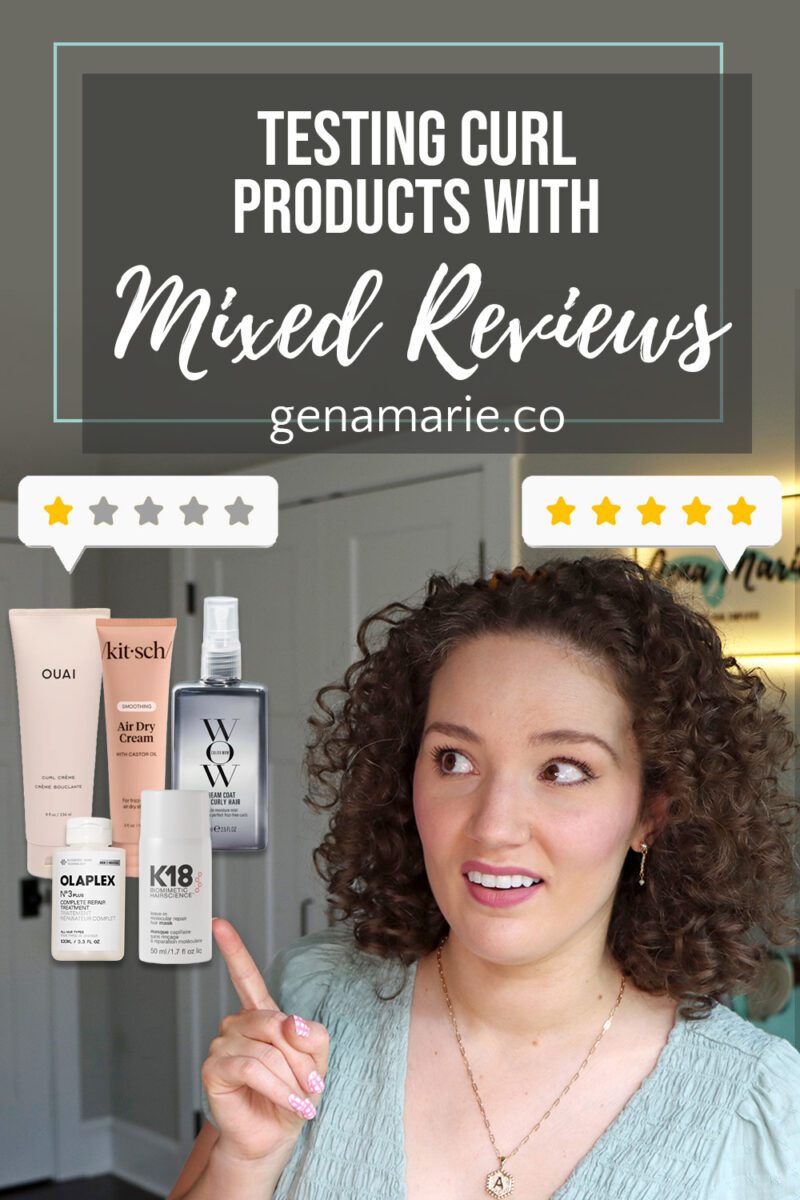
You read the reviews online. One person says a product completely changed their hair. Someone else says it’s the worst thing they’ve ever tried. And
2 Responses
Okay, so I must know.. which diffusers do you like best and would recommend for hip length hair?
XF – F strands primarily, high – mid density, mixed porosity, but I think mostly low. I have characteristics of both so I’m unsure.
My hair is mostly 2A without styling but while I diffuse, I can see 2C+ potential.. I just can’t get it to stay. I can never get my mids to roots to dry so they stretch out and then by the time I’m done, the cast breaks on the ends from being overworked.
I’m very new to diffusing so I know I can definitely improve on technique, but I have issues with getting all my hair in the bowl (from ends to roots due to length). I rely a lot on pixie diffusing. My hair is too long and heavy when wet to retain nice definition.
I want a shark for its awesome diffuser and adjustable attachments but I went with a more affordable option for the time being, with the Black Orchid diffuser.
How does the CurlSmith diffuser compare?
Love your videos ???
The next time I read a blog, Hopefully it doesnt fail me just as much as this one. I mean, Yes, it was my choice to read through, but I actually thought you would have something useful to say. All I hear is a bunch of moaning about something that you could fix if you werent too busy searching for attention.